Large-Format Tile for Underfloor Heating: Choosing and Installing
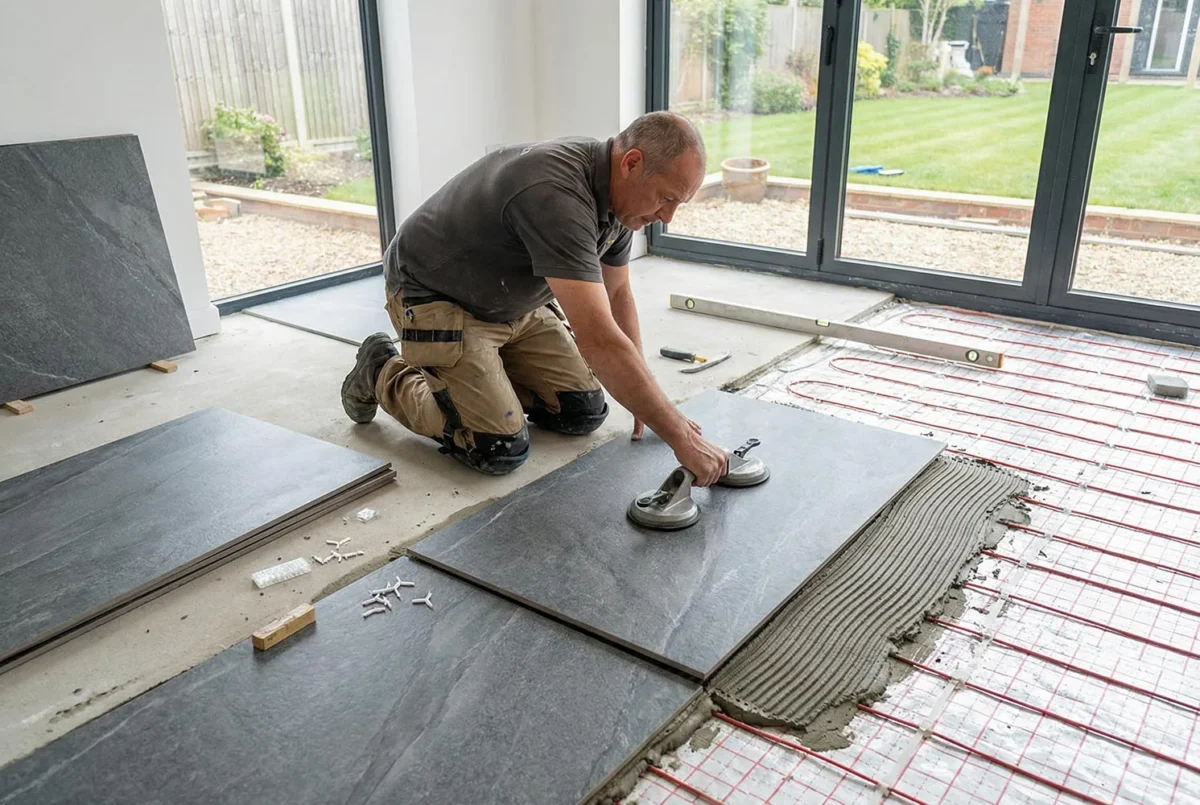
Underfloor heating and large-format tile: an ideal combination
Underfloor heating long ago stopped being a luxury and became the standard of comfortable housing. Pleasant warmth underfoot, even heating of the room, no radiators on the walls: millions of homeowners have appreciated these advantages. And large-format tile and natural stone are among the best coverings for underfloor heating systems thanks to their thermal conductivity. However, a wrong choice of materials or mistakes during installation can lead to cracks, delamination and failure of the system.
M-STONE has extensive experience laying large-format tile on underfloor heating systems. We know all the nuances of this process and are confident of a result that will delight you with warmth and beauty for many years.
Types of underfloor heating systems
Water underfloor heating
How it works: heat is transferred from hot water circulating through pipes embedded in or under the screed.
System components
- Pipes (metal-plastic, cross-linked polyethylene PEX, copper)
- A manifold (a distribution unit)
- A (circulation) pump
- A boiler or a heat pump
- A thermostat
Advantages
- Economical to run
- The possibility of connecting to central heating
- Even heating
- Suitable for large areas
- Durability (30-50 years)
Disadvantages
- Complex installation
- A thicker screed is needed (7-10 cm)
- A rise in floor level
- Inertia (slow heating and cooling)
- A risk of leaks
Where it is used
- Private houses
- Cottages
- Ground floors (above an unheated basement)
- Large areas
Electric underfloor heating (cable)
How it works: a heating cable converts electrical energy into heat.
Types
Single-core cable
- Both ends are connected to the thermostat
- Laid in a loop
- Cheaper
Twin-core cable
- One end is connected, the other is capped
- Easier to lay
- Less electromagnetic radiation
A heating mat
- A cable fixed to a mesh
- Simple installation
- Thin (3-4 mm)
- Can be laid in a layer of adhesive
Advantages
- Easier installation than water heating
- Precise temperature control
- Fast heating
- A thinner ‘pie’ (especially mats)
- Needs no boiler
Disadvantages
- A higher running cost (electricity)
- Electromagnetic radiation (minimal)
- Full replacement if the cable is damaged
- Limits on the capacity of the electrical network
Where it is used
Infrared (film) underfloor heating
How it works: carbon elements emit infrared waves that heat objects, not the air.
Advantages
- The thinnest option (0.3-0.5 mm)
- Fast heating
- Economical
- Simple installation
- Damaged sections are easy to replace
Disadvantages
- NOT RECOMMENDED UNDER TILE!
- Designed for ‘dry’ installation (laminate, parquet)
- Poor adhesion of the adhesive
- A risk of damage during laying
Important: M-STONE does not recommend laying tile on infrared film. For tile use cable systems or water heating.
Why tile and stone are ideal for underfloor heating
Thermal conductivity
Comparing materials
| Material | Thermal conductivity (W/m·K) | Rating for underfloor heating |
|---|---|---|
| Porcelain stoneware | 1.3-1.5 | Excellent |
| Ceramic tile | 1.0-1.3 | Excellent |
| Natural stone | 1.5-3.5 | Excellent |
| Laminate | 0.1-0.2 | Satisfactory |
| Parquet | 0.15-0.2 | Satisfactory |
| Carpet | 0.05-0.1 | Poor |
Conclusion: tile and stone transfer heat 10-15 times more effectively than wood or laminate.
Heat resistance
Porcelain stoneware and natural stone:
- Withstand temperatures up to 100°C and above
- Do not deform from heating
- Release no harmful substances
- Do not change colour or properties
Dimensional stability
Unlike wood:
- They do not expand and contract when heated
- They do not create gaps
- They keep their shape
Hygiene
- They do not accumulate dust and allergens
- Easy to wash
- Not a medium for bacteria
- Ideal for allergy sufferers
Features of choosing tile for underfloor heating
Technical requirements
Water absorption
- Recommended: below 3%
- Ideal: below 0.5% (porcelain stoneware)
- Why it matters: minimal porosity means better heat transfer
Wear resistance
- PEI class III-V depending on the room
- Underfloor heating increases wear (micro-expansion)
Heat resistance
- A ‘for underfloor heating’ mark or a snowflake with a sun
- Withstanding temperature changes
Thickness
- Optimal: 8-10 mm
- Thinner: faster heating, but lower strength
- Thicker: slower heating, greater inertia
Tile format
Large-format tile on underfloor heating: the specifics
Advantages of a large format:
- Fewer joints: better heat transfer
- Aesthetics
- Fewer places for potential delamination
Risks of a large format:
- A larger area means greater stresses when heated
- A more flexible adhesive is needed
- A critically flat base
M-STONE recommendations
- Large formats (60×120 cm and larger) can be used
- Flexible adhesive (S2) is mandatory
- Expansion joints are mandatory
- Careful preparation of the base
Type of surface
Recommended for underfloor heating
Matt surface
- Better heat transfer
- Not slippery
- More practical
Lappato (semi-polished)
- A compromise between aesthetics and practicality
- Acceptable heat transfer
Polished
- Somewhat worse heat transfer
- Slippery when heated (condensation)
- For dry rooms
Colour and design
It has no effect on efficiency, but:
Light colours
- Visually hide dust
- Do not heat up in the sun
Dark colours
- May additionally heat up from the sun
- Visually ‘hold’ warmth better
Adhesive for tile on underfloor heating
Requirements for the adhesive
Flexibility is critical!
When heated and cooled, materials expand and contract. The adhesive must compensate for these movements.
Classification by flexibility
| Class | Deformation | Application |
|---|---|---|
| Without S | Rigid | NOT for underfloor heating |
| S1 | 2.5-5 mm | The minimum for underfloor heating |
| S2 | >5 mm | Recommended for underfloor heating |
For large-format tile on underfloor heating
- Class C2S2 is mandatory!
- Or C2S1 + a flexibiliser
Recommended adhesives
Mapei
- Keraflex Maxi S1: the standard choice
- Keralastic T: highly flexible
- Granirapid: fast-setting flexible
Litokol
- Litoflex K80: for underfloor heating
- Litoelastic: maximum flexibility
Ceresit
- CM 17: flexible
- CM 117: highly flexible
Kerakoll
- H40 Eco Flex: flexible
- Biogel No Limits: a universal premium
Application technology
Double application is mandatory!
- Applying adhesive to the base (with a notched trowel)
- Applying a thin layer to the tile
- 100% coverage of the space: voids are unacceptable!
Why voids are critical
- Hot spots (local heating of the cable)
- Failure of the cable
- Tile cracks
- Delamination
Grout for underfloor heating
Requirements
Elasticity
- The grout must also be flexible
- Compensation for tile movement
Heat resistance
- Withstanding temperatures up to 80°C
- Keeping its colour
Recommendations
Cement grout
- With flexible additives
- Or adding a flexibiliser (latex)
- Check suitability for underfloor heating
Epoxy grout
- An ideal choice
- Elasticity
- Heat resistance
- Durability
- Does not crack
M-STONE recommends: for underfloor heating, especially with large-format tile, the best choice is epoxy grout.
Technology of laying tile on underfloor heating
The preparatory stage
Checking the underfloor heating system
Before laying:
- Checking the integrity of the cable / pipes
- Testing the system
- Checking the thermostat
- Recording the layout of the cable / pipes (a photo, a diagram)
Important: keep the layout of the heating elements; you will need it for drilling and repairs!
Preparing the screed
For water heating:
- Screed above the pipes of at least 30 mm
- Complete drying (28 days)
- A test start-up of the system
- Checking for cracks
For a cable in the screed:
- Screed above the cable of at least 30 mm
- Full drying
- A test start-up
For heating mats:
- Laying directly in a layer of adhesive
- The base must be flat
- The mat must be fully embedded in the adhesive
Heating before laying
Procedure
- Switch the system on to the minimum (20-25°C)
- Heat for 24-48 hours
- Switch the system off
- Wait for it to cool to room temperature
- Lay the tile
Why heat it
- Finding defects in the system
- Shrinkage of the screed
- Checking operation before it is ‘covered’ with tile
Laying the tile
Step 1: priming
- A deep-penetration primer
- Even coverage
- Drying according to the instructions
Step 2: applying the adhesive
- S1/S2 flexible adhesive
- Double application (on the floor and the tile)
- A 10-12 mm notched trowel
- Small areas (the adhesive must not dry)
Step 3: laying
- Pressing the tile down
- Levelling (TLS)
- Checking there are no voids
- A minimum joint of 2-3 mm
Step 4: expansion joints
- Around the perimeter of the room
- Every 20-25 m² (more often for underfloor heating!)
- In doorways
- Filled with flexible sealant
Grouting the joints
Timings
- 24-48 hours after laying
- The adhesive must harden fully
Technology
- Standard for the chosen type of grout
- Filling the joints thoroughly
- Removing the excess
Putting into service
Critically important!
The schedule for the first start-up
- Waiting after laying: 7-14 days (depending on the adhesive)
- Waiting after grouting: 7 days
- First start-up: 20°C
- Increase by 5°C every day
- Reaching the working temperature in 5-7 days
Why gradually
- Even heating
- Avoiding thermal shock
- Preventing cracks
- The adhesive gaining strength
Maximum surface temperature
- Recommended: up to 28-30°C
- Maximum: 35°C
- Higher: a risk of damage
Common mistakes and how to avoid them
Mistake 1: the wrong adhesive
The problem: using ordinary (non-flexible) adhesive.
Consequences: cracked tile, delamination, a hollow sound.
The solution: only S1 or S2 class adhesive!
Mistake 2: voids under the tile
The problem: incomplete coverage of the space with adhesive.
Consequences: overheating of the cable, failure, cracks, uneven heating.
The solution: double application, 100% contact.
Mistake 3: starting the system too early
The problem: switching on the underfloor heating before the adhesive has fully hardened.
Consequences: destruction of the adhesive joint, delamination.
The solution: wait 14-21 days, heat gradually.
Mistake 4: a sudden change in temperature
The problem: switching on to the maximum, abruptly switching off.
Consequences: thermal shock, cracks.
The solution: raise/lower the temperature gradually.
Mistake 5: no expansion joints
The problem: a continuous surface without compensation joints.
Consequences: tile bulging, cracks.
The solution: expansion joints every 20-25 m² and around the perimeter.
Mistake 6: drilling without a layout
The problem: damage to the cable when drilling.
Consequences: failure of the system, a risk of electric shock.
The solution: keep the laying layout, use a hidden-wiring detector.
Features for natural stone
Additional requirements
Stone on underfloor heating
- The same requirements as for porcelain stoneware
- In addition: taking the thermal expansion of the stone into account
- Some stones (for example slate) expand differently in different directions
White adhesive for light stone
- Mandatory for marble, travertine, onyx
- Flexible white adhesive
Recommended kinds
Ideally suited
- Granite (the most stable)
- Quartzite
- Marble (with reservations)
With caution
- Travertine (porosity)
- Onyx (soft, sensitive)
- Slate (layered)
Temperature regime for stone
Recommended surface temperature
- Up to 28°C is optimal
- Above 30°C some stones may yellow
- Avoid sudden changes
Contact information
M-STONE: experts in laying on underfloor heating
📞 Phones: +38 068 100 27 96, +38 050 914 18 99 📧 Email: [email protected] 🌐 Website: https://mstone.ua/
Social media
- Instagram: https://www.instagram.com/mstone_kiev/
- Facebook: https://www.facebook.com/mstone.kyiv/
- YouTube: https://www.youtube.com/@M-Stone_Kyiv/
Geography of work
Kyiv: all districts Kyiv region: Brovary, Irpin, Bucha, Vyshhorod, Vyshneve, Boiarka, Kozyn, Koncha-Zaspa and others All of Ukraine: travel to projects
M-STONE advantages for underfloor heating
✅ Underfloor heating experience: water and electric ✅ The right materials: flexible adhesive, epoxy grout ✅ Large formats: following the technology ✅ Expansion joints: competent planning ✅ Operating instructions: advice on starting up ✅ A guarantee: on all work carried out
The current cost of work for your project can be calculated in the online calculators or confirmed by the manager: it depends on the material, the slab format and the condition of the substrate. The consultation is free.

About M-STONE
This material was prepared by the M-STONE team: 20 years of brand history, installation of large-format tile and natural stone in Kyiv and across Ukraine. The company is led by Oleg Dolynskyi. The recommendations describe the typical order of work; a specialist refines the solution for your project after a consultation.
Contact us
We will price your project
Send the dimensions and slab format: we will calculate the material and installation and suggest the timing.