Tile Levelling Systems (TLS): How to Achieve a Perfectly Flat Surface
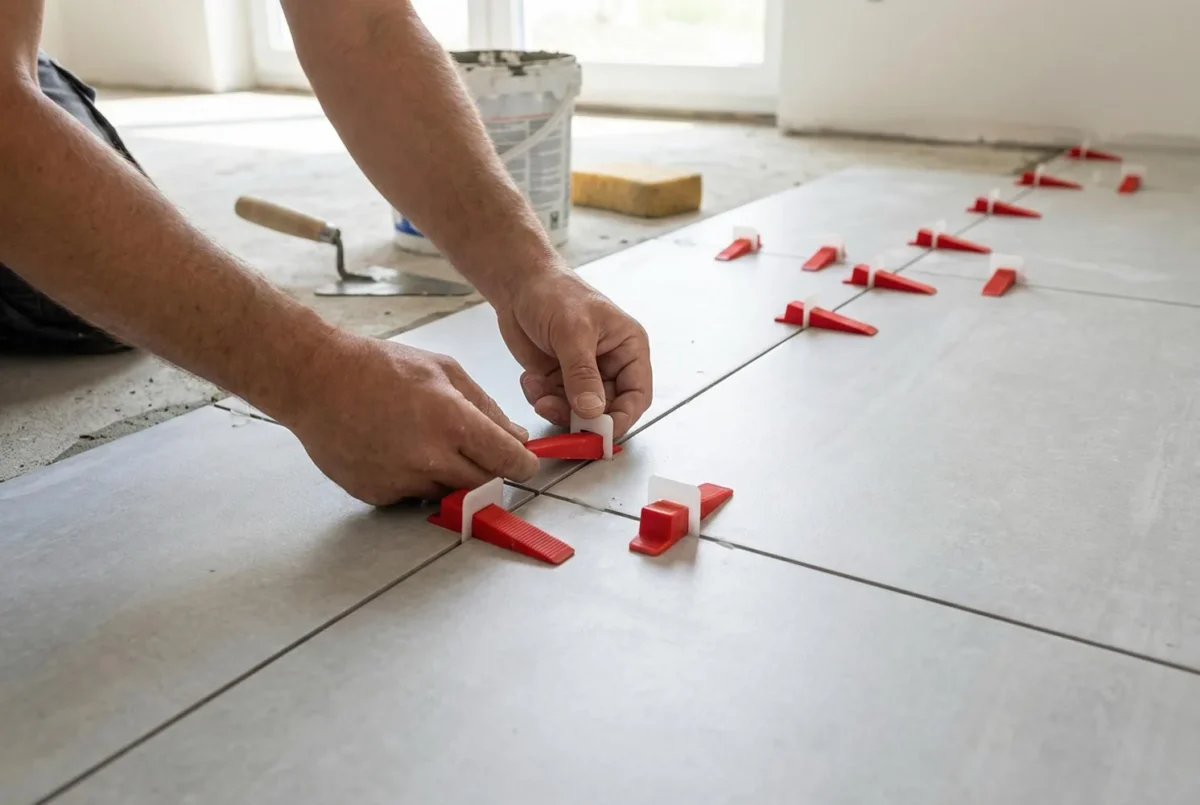
A TLS is the secret of a flawless plane
When you see a perfectly flat floor of large-format tile without a single difference in level between tiles, behind that result is not only the installer’s skill but also special technical solutions. A tile levelling system (TLS) is an innovative tool that makes it possible to achieve a perfect plane even when working with the largest tile formats.
M-STONE uses professional levelling systems on all projects with large-format tile. It is not an option but a mandatory quality standard that guarantees a flawless result.
What a TLS is and why it is needed
The problem a TLS solves
Several problems arise when laying tile on adhesive:
Different adhesive layer thickness Even with careful application, the thickness of the adhesive can differ in different areas. Before it sets, the adhesive ‘settles’ unevenly under the weight of the tile.
Tile deformation Porcelain stoneware and especially large-format tile can have slight warping (up to 0.5%). On a 120 cm slab this can mean up to 6 mm of bow!
Movement during setting Until the adhesive has set, the tile can shift, especially on vertical surfaces.
The human factor Even the most experienced craftsman cannot hold a perfect level for hours on end.
How a TLS works
A TLS mechanically holds neighbouring tiles at one level until the adhesive has fully hardened.
The main components
- The base (clip): placed under the tile in the joint
- The wedge (cap, clamp): inserted into the base from above and tightened
- The tightening tool: ensures even pressure
How it works
- The first tile is laid
- A TLS base is placed in the joint
- The second tile is laid
- A wedge is inserted into the base from above and tightened
- The wedge presses both tiles to the same level
- After the adhesive hardens the wedge is removed, and the lower part of the base stays in the joint
Types of tile levelling systems
By construction
Wedge systems
The classic type with a base and a wedge.
The principle: the wedge enters the slot of the base and, as it is pushed in, presses the tiles together.
Advantages:
- Simple to use
- The possibility of precise adjustment
- Wedges can be reused many times
- An affordable price
Popular brands:
- Rubi Delta Level
- Raimondi RLS
- DLS (Datum Leveling System)
Rotary (screw) systems
Clamping by turning a cap.
The principle: the cap is screwed onto the threaded part of the base, pressing the tiles.
Advantages:
- More even pressure
- A lower risk of damaging the tile
- Caps can be reused many times
Popular brands:
- Spin Doctor
- Perfectlevel Master
Self-levelling (with automatic tensioning)
Systems with a spring or lever mechanism.
The principle: once fitted, the system automatically creates the necessary force.
Advantages:
- Speed of installation
- The same pressure at all points
- Ideal for large areas
Popular brands:
- Litolevel
- ATR (Assisted Tile Repositioning)
By purpose
For floors
Features:
- A standard design
- Vertical installation
- It is enough to hold the tile against settling
For walls
Features:
- Stronger fixing (the tile pulls downward)
- Sometimes additional elements to prevent sliding
- Fast setting is critical
Universal
Most modern systems work both on floors and on walls.
By joint thickness
TLS are made for different joint widths:
| Base thickness | Joint width | Application |
|---|---|---|
| 1 mm | 1-1.5 mm | Rectified tile, minimal joints |
| 1.5 mm | 1.5-2 mm | The standard for large formats |
| 2 mm | 2-2.5 mm | A universal option |
| 3 mm | 3-4 mm | Wider joints, natural stone |
For large-format tile M-STONE recommends
- Base thickness 1.5-2 mm
- Joint width 2 mm
An overview of popular levelling systems
Rubi Delta Level System
Country: Spain Type: wedge
Components:
- A clip (single-use)
- A wedge (reusable, up to 25-30 uses)
- Pliers for removal
For tile:
- Thickness 3-12 mm (different clips)
- Formats up to 120×240 cm
- Joints 1.5-4 mm
Advantages:
- High quality of materials
- Reliable fixing
- A well-known brand
Raimondi RLS (Raimondi Leveling System)
Country: Italy Type: wedge
Components:
- A base with a break-off foot
- A reusable wedge
- Special pliers
Features:
- The base breaks off flush with the tile surface
- A minimal trace in the joint
- A professional tool
For tile:
- Thickness 3-20 mm
- Any formats
DLS (Datum Leveling System)
Type: wedge
Components:
- A clip
- A wedge
- A tightening gun
Features:
- The gun ensures the same pressure
- Speed of work
- Ergonomics
Perfect Level Master
Type: rotary (screw)
Components:
- A threaded post
- A screw-on cap
- A special key
Features:
- Smooth adjustment of the pressure
- A lower risk of damaging the tile
- Reusable caps (up to 50+ times)
Litolevel from Litokol
Country: Italy Type: self-levelling
Features:
- Automatic tensioning
- Quick installation
- The premium segment
Domestically made TLS
An economical option:
- Much cheaper than European ones
- Enough for one-off jobs
- Lower durability of the wedges
- Possible errors in dimensions
Technology of working with a TLS
Preparation
Calculating quantities
- At least 3 clips per tile (for small formats)
- For 60×60 cm tile: 4 pieces around the perimeter + 1 in the centre of each side
- For 60×120 cm tile: 6-8 pieces
- For 120×120 cm tile: 8-12 pieces
- For 120×240 cm tile: 10-16 pieces
Calculation formula: number of bases = (tile perimeter / installation step) × number of tiles × 0.5
Installation step: 25-30 cm for standard formats, 20-25 cm for large formats
Allowance: +10% for waste
The laying process with a TLS
Step 1: laying the first tile
- Apply adhesive to the base and the tile (double application)
- Lay the tile
- Level it with a spirit level
- Press it for contact with the adhesive
Step 2: fitting the TLS bases
- Place the bases in the joint on the side of the next tile
- Push the base 1-2 cm under the tile
- Distribute the bases evenly around the perimeter
- Distance from the tile corner: 5-10 cm
Step 3: laying the next tile
- Apply the adhesive
- Lay the tile right up against the TLS bases
- The bases must stick out into the joint between the tiles
- Level the tile roughly in advance
Step 4: tightening the wedges
- Insert the wedge into the slot of the base
- Tighten by hand or with a tool
- Make sure the tiles meet at the same level
- Do not overtighten! (risk of a cracked tile or base)
Step 5: checking
- Run a hand over the joint: no difference in level should be felt
- Check with a level
- If needed, tighten or loosen individual wedges
Step 6: removing the TLS
- Wait for the adhesive to harden fully (24-48 hours)
- Knock the wedge out sideways with a light blow
- The base breaks off at the level of the tile surface
- The remainder of the base stays in the joint (under the grout)
- Collect the wedges for reuse
Typical mistakes when working with a TLS
Mistake 1: removing too early
- The adhesive has not set
- The tile shifts
- The result: differences in level
Mistake 2: overtightening the wedge
- A cracked tile
- Destruction of the base
- Surface deformation
Mistake 3: too few clips
- The tile bows between the fixing points
- A ‘wave’ on the surface
Mistake 4: fitting into dried adhesive
- The adhesive has started to set
- The TLS cannot correct the position
- The tile gets ‘stuck’ in the wrong position
Mistake 5: wrong depth of base insertion
- Too deep: the wedge does not reach
- Too shallow: the base does not hold the tile
Alternatives and additions to a TLS
Tile spacers
The traditional way of ensuring even joints.
Use:
- For small formats
- For fixing the joint width (not for levelling!)
- As a supplement to a TLS
Limitations:
- They do not level the plane
- Not suitable for large formats
T-shaped and U-shaped inserts
Use:
- For junctions of three or four tiles
- Together with a TLS
A laser level
An indispensable tool for controlling the plane.
Use:
- Checking horizontals / verticals
- Monitoring deviations
- Marking out
Combined with a TLS: the laser level shows the overall picture, and the TLS provides local levelling between tiles.
The straightedge
A long metal rule for checking the plane.
Use:
- Checking the flatness of the base
- Checking the laid tile
- Finding differences in level
Calculating the TLS for a project
Example: a 20 m² floor, 60×120 cm tile
- Number of tiles: ~28 pcs
- Bases per tile: 6 pcs
- Total bases: 28 × 6 × 0.5 (divided among neighbours) = 84 pcs
- Wedges: 84 pcs (or fewer, if reusable)
A saving or an expense?
Arguments FOR using a TLS
- A guaranteed result
- Speed of work (fewer adjustments)
- A lower risk of redoing the work
- Durability of the surface (without differences in level, there is less load)
Conclusion: the outlay on a TLS is negligible compared with the cost of the tile and the work. Saving on a TLS means saving on quality.
Our standard
- Rubi Delta Level or Raimondi RLS
- The optimal installation step for each format
- Pressure control
- Timely removal
For special projects
- Premium systems for thin porcelain stoneware
- Special solutions for natural stone
- Individual selection to suit the conditions of the site
Contact information
M-STONE: a flawless plane guaranteed
📞 Phones: +38 068 100 27 96, +38 050 914 18 99 📧 Email: [email protected] 🌐 Website: https://mstone.ua/
Social media
- Instagram: https://www.instagram.com/mstone_kiev/
- Facebook: https://www.facebook.com/mstone.kyiv/
- YouTube: https://www.youtube.com/@M-Stone_Kyiv/
Geography of work
Kyiv: all districts Kyiv region: Brovary, Irpin, Bucha, Vyshhorod, Vyshneve, Boiarka, Kozyn, Koncha-Zaspa and others
M-STONE’s advantages
✅ Professional TLS: only quality systems ✅ The optimal step: calculated for each format ✅ Quality control: checking at every stage ✅ Experience: thousands of square metres of perfect surfaces ✅ A guarantee of flatness: no differences in level!
The current cost of work for your project can be calculated in the online calculators or confirmed by the manager: it depends on the material, the slab format and the condition of the substrate. The consultation is free.

About M-STONE
This material was prepared by the M-STONE team: 20 years of brand history, installation of large-format tile and natural stone in Kyiv and across Ukraine. The company is led by Oleg Dolynskyi. The recommendations describe the typical order of work; a specialist refines the solution for your project after a consultation.
Contact us
We will price your project
Send the dimensions and slab format: we will calculate the material and installation and suggest the timing.