Cutting and Finishing Large-Format Tile: Tools and Technologies
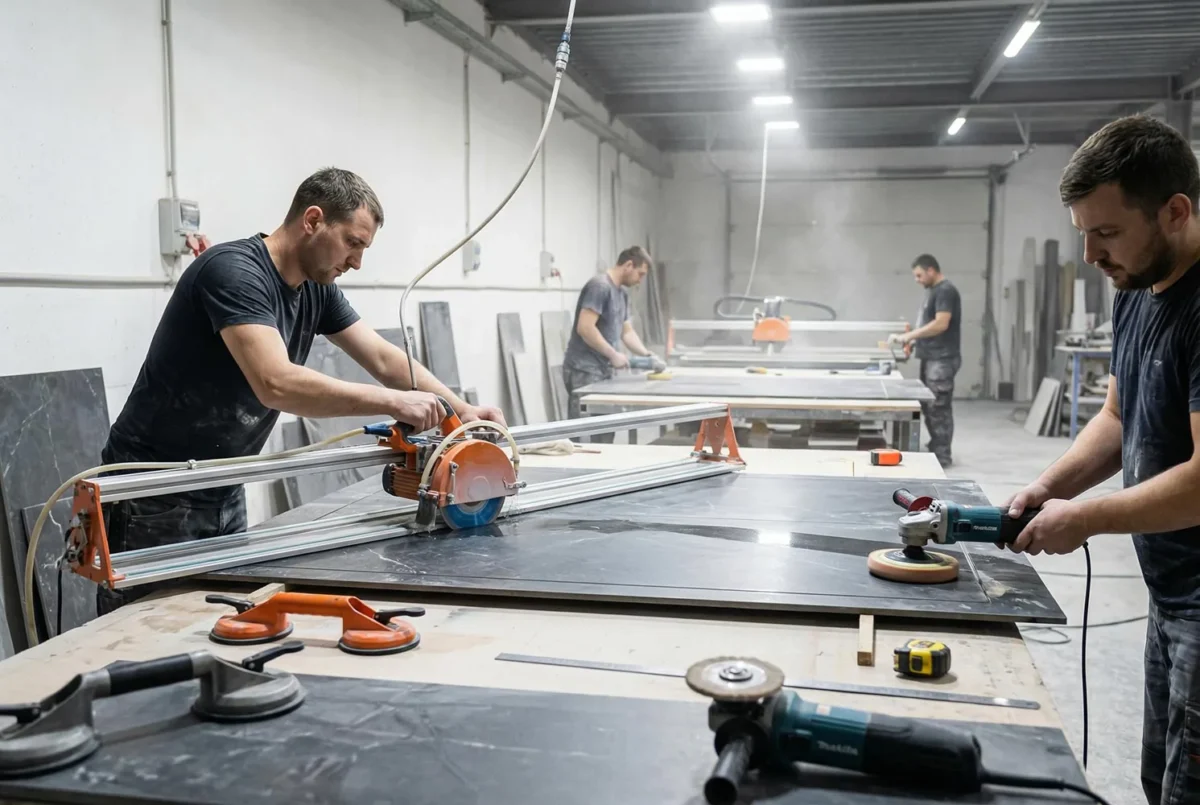
Cutting large-format tile is the art of precision
Large-format tile impresses with its beauty and monolithic look, but working with it needs a special approach, especially when it comes to cutting. A slab of 120×240 cm or 160×320 cm is not a material you can cut with an ordinary tile cutter on your knee.
M-STONE is equipped with a full set of professional equipment for cutting and finishing large-format tile and natural stone. Our craftsmen make cuts of any complexity, from straight lines to complex curved cut-outs.
Features of cutting large-format tile
Why a large format is a special challenge
Size and weight
- A 120×240 cm slab weighs 50-70 kg
- At least two people are needed to handle it
- It is awkward to work without special equipment
- A high risk of damage with careless handling
Fragility
- Thin porcelain stoneware (6-10 mm) cracks easily
- Stress from a wrong cut spreads across the whole slab
- Internal defects may show up during cutting
- Tool vibration can cause a chip
Precision
- On a large slab any deviation is multiplied
- An error of 1 mm per metre = 2.4 mm on a 240 cm slab
- Crooked cuts cannot be hidden
- Joints with other slabs will reveal every inaccuracy
The cost of a mistake
- A damaged slab cannot be repaired
- There may be no spare (especially for exclusive collections)
Types of cuts
A straight cut The simplest type: cutting along a straight line parallel or perpendicular to the edge of the tile.
Use:
- Trimming the edge slabs at walls
- Forming the required size
- Splitting a slab in half
A diagonal cut Cutting at an angle to the edges of the tile.
Use:
- Diagonal laying
- Fitting to angled walls
- Decorative elements
An L-shaped cut-out A cut-out in the shape of the letter “L” to go around obstacles.
Use:
- Going around door frames
- Going around boxings and niches
- Fitting to wall projections
A U-shaped cut-out A cut-out in the shape of the letter “U”.
Use:
- Going around columns
- Going around large-diameter pipes
- Niches
A round cut-out (hole) A round hole of various diameters.
Use:
- Holes for pipes
- Holes for sockets
- Cut-outs for mixers
- Holes for spotlights
A curved cut-out Cutting along a complex curved line.
Use:
- Going around rounded elements (columns, baths)
- Decorative shapes
- Fitting to arches
A shaped cut-out Complex shapes: triangles, trapezoids, non-standard figures.
Use:
- Mosaic compositions
- Decorative panels
- Non-standard architectural solutions
Tools for cutting large-format tile
Manual tile cutters
Mechanical tile cutters for straight cuts by the score-and-snap method.
How it works
- A cutting wheel scores the glaze
- The tile breaks along the score line
- A clean, even edge without chips
For large formats
Rubi TX-MAX (Spain)
- Cutting length: up to 180 cm
- Diagonal cut: tile up to 120×120 cm
- A reinforced construction
- A high-pressure breaker
Sigma 3P4M / 3P5M (Italy)
- Cutting length: up to 185 cm (3P5M)
- Legendary quality
- Self-lubricating bearings
- Accuracy to 0.1 mm
Montolit Masterpiuma P3 (Italy)
- Cutting length: up to 163 cm
- The premium segment
- Perfect accuracy
Advantages of manual tile cutters
- Cutting speed
- No dust
- A clean edge
- Mobility
- Needs no electricity
Limitations
- Straight cuts only
- Does not cut thick tile (over 15-20 mm)
- Not for natural stone
- Length limits
Electric tile cutters (wet saws)
Stationary machines with a diamond blade and water cooling.
How it works
- A diamond blade rotates at high speed
- Water cools the blade and washes away dust
- The tile is fed to the blade manually or automatically
- A clean, even cut
Types of electric tile cutters
With the blade below
- The blade below, the tile on top
- A simpler construction
- For small and medium formats
With the blade above (bridge saws)
- The blade on a moving bridge above
- The tile stays still on the table
- For large formats
- Professional equipment
Models for large formats
Rubi DC-250 / DV-200
- Cutting length: up to 130 cm
- A powerful motor
- Blade tilt for angled cuts
Sigma Jolly / Kera-Cut
- Italian precision
- A modular system
- Different configurations
Battipav Supreme / Class
- Cutting length: up to 150+ cm
- Stationary equipment
- Industrial quality
Advantages of electric tile cutters
- Precision
- The ability to cut at an angle (45°)
- A clean edge without chips
- Cutting thick tile and stone
- Complex cut-outs (with a suitable blade)
Limitations
- Stationary equipment
- Water and electricity are needed
- Slower than a manual tile cutter
- Noise and splashes
Angle grinders
A universal hand-held power tool with a diamond blade.
Use for tile
- Curved cuts
- L- and U-shaped cut-outs
- Trimming on site
- Cutting small fragments
Choosing the blade
- Continuous (for a clean cut)
- Segmented (faster, rougher)
- Turbo (a compromise)
- Diameter: 115, 125, 180, 230 mm
Safety rules
- Safety goggles are mandatory!
- A respirator (a lot of dust)
- Gloves
- A protective guard on the tool
Advantages
- Mobility
- Versatility (curved cuts)
- Availability
- Speed for simple cuts
Limitations
- A lot of dust (dry cutting)
- Lower accuracy
- Risk of chips
- A dangerous tool
- Not for long straight cuts
Special equipment for large formats
Cutting tables for slabs
Large tables with built-in rails for accurate cutting of large slabs.
Features:
- Length up to 350+ cm
- Accurate positioning of the slab
- Integration with an electric cutter
Rail systems
Guide rails fitted on the slab for an even straight cut with an angle grinder.
Popular systems:
- Rubi Slim Cutter
- Sigma Kera-Cut
- Montolit Flash Line
How it works:
- The rail is attached to the tile with suction cups
- A carriage with an angle grinder or cutting wheel moves along the rail
- An accurate, even cut along the whole length
CNC machines (computer numerical control)
Automated machines for high-precision cutting and finishing.
Capabilities:
- Programming any shapes
- Accuracy to 0.1 mm
- Repeatability
- Complex cut-outs
Use:
- Making countertops
- Decorative panels
- Complex architectural elements
- Serial production
Tools for cut-outs and holes
Core bits
Cylindrical attachments for drilling round holes.
Types:
- Diamond core bits (for dry and wet drilling)
- Tungsten-carbide core bits
- Bi-metal core bits
Diameters:
- Standard: 6, 8, 10, 12, 20, 32, 40, 50, 65, 80, 100, 120 mm
- For sockets: 65-68 mm
- For pipes: depending on the pipe diameter
Adjustable hole cutter
An adjustable tool for holes of various diameters.
Features:
- Diameter adjustment
- Saves on core bits of different sizes
- For occasional use
Oscillating tool (multi-tool)
A multifunctional tool with vibration.
Use for tile:
- Plunge cuts into the edge of a tile
- Enlarging holes
- Fine work
Technology of cutting large-format tile
Preparing to cut
1. Planning
- Determining all the necessary cuts
- Calculating the cutting layout of the slabs
- Minimising waste
- Planning the sequence
2. Marking
- Accurate measurements
- Marking with a pencil or marker
- Checking the dimensions before cutting
- Allowing for the joint width
3. Preparing the workplace
- A flat, stable surface
- Enough room to manoeuvre
- Good lighting
- Access to water and electricity
4. Preparing the tool
- Checking the condition of the blade / wheel
- Checking the water level (for wet saws)
- Setting up the stops and guides
Technique for a straight cut with a manual tile cutter
Step 1: positioning
- Place the tile face up
- Align it with the cutting line
- Fix it with the stop
Step 2: scoring
- Set the wheel at the start of the line
- Press evenly
- Run the wheel along the whole line in one motion
- Do not repeat the scoring!
Step 3: snapping
- Set the breaker in the centre of the line
- Press evenly on both sides
- The tile breaks along the score line
Important for large formats
- Support the slab on both sides
- Even pressure when scoring
- Do the snap with two people
Technique for a cut with an electric tile cutter
Step 1: preparation
- Fill the tray with water
- Check the condition of the blade
- Set the stop to the required size
Step 2: positioning
- Place the tile on the table
- Align the cutting line with the blade
- Press against the stop
Step 3: cutting
- Switch on the machine
- Wait for full speed
- Feed the tile slowly to the blade
- Do not push: let the blade cut
- A steady feed speed
- Cut through to the end
For large formats
- One worker feeds the tile
- The other receives it on the other side
- Support the slab so it does not sag
- Large slabs only on large machines
Technique for a 45° cut (mitre)
For forming corner joints without a visible edge.
Equipment
- An electric tile cutter with a tilting blade
- Or a special mitre machine
Technique
- Tilt the blade to 45°
- Do not cut up to the glaze: leave 0.5-1 mm
- The glaze must stay intact on the edge
- Finish the edge with sandpaper
Application
- External wall corners
- Windowsills
- Countertops
- Stairs (nosing)
Technique for curved cuts
Tool: an angle grinder with a diamond blade
Technique
- Mark the curved line on the tile
- Make a series of cuts up to the line (stopping 1-2 mm short)
- Break out the segments
- Grind the edge down to the line
Alternative: cut out with straight cuts, then finish the edge by grinding.
Technique for round cut-outs
Small holes (up to 12 mm)
- A ceramic drill bit
- A diamond drill bit
- Low speed, with water
Medium holes (12-120 mm)
- A diamond core bit of the right diameter
- Drilling with water
- Low speed
- Do not press hard
Large holes (over 120 mm)
- Marking the outline
- Drilling holes along the outline
- Joining the holes with an angle grinder
- Grinding the edge
For sinks and hobs
- Accurate marking from a template
- Drilling the corners
- Cutting the sides with an electric cutter
- Grinding for a clean edge
Finishing edges and surfaces
Types of edge finish
A factory edge An edge finished at the factory. For rectified tile it is perfectly straight.
A cut edge (unfinished) The edge after cutting. It may have micro-chips and needs finishing for visible areas.
A ground edge Finished with grinding tools. Smooth, but matt.
A polished edge Ground and polished to a shine. For visible edges of countertops and windowsills.
A bevel An edge cut at 45° or another angle. It removes the sharp edge and prevents chips.
Tools for finishing edges
Grinding discs and attachments
- Diamond pads of various grits
- From coarse (50) to fine (3000)
- Sequential working from coarse to fine
Polishing attachments
- Felt wheels
- Polishing pastes
- For the final finish
Routers for bevels
- Hand routers with diamond bits
- For forming bevels and profiles
Technique for grinding an edge
Step 1: coarse grinding (grit 50-100)
- Levelling the edge
- Removing the cutting marks
Step 2: medium grinding (200-400)
- Smoothing the surface
- Removing the scratches from coarse grinding
Step 3: fine grinding (800-1500)
- Preparing for polishing
- A smooth surface
Step 4: polishing (3000 + paste)
- Achieving the shine
- The final look
Important
- Grind with water
- Do not overheat
- Even pressure
- Check the result at every stage
Manual tile cutters
- Sigma 3P5M (up to 185 cm)
- Rubi TX-MAX
- Rail systems for slabs
Electric tile cutters
- Bridge machines for large formats
- Machines with a tilting blade (45° mitre)
Tools for cut-outs
- A full set of diamond core bits
- Angle grinders of various sizes
- Oscillating tool
Finishing
- Grinding machines
- Sets of pads of all grits
- Polishing equipment
Measuring
- Laser levels
- Tape measures, squares, straightedges
- Templates for marking
Contact information
M-STONE: professional cutting and finishing
📞 Phones: +38 068 100 27 96, +38 050 914 18 99 📧 Email: [email protected] 🌐 Website: https://mstone.ua/
Social media
- Instagram: https://www.instagram.com/mstone_kiev/
- Facebook: https://www.facebook.com/mstone.kyiv/
- YouTube: https://www.youtube.com/@M-Stone_Kyiv/
Geography of work
Kyiv: all districts Kyiv region: Brovary, Irpin, Bucha, Vyshhorod, Vyshneve, Boiarka, Kozyn, Koncha-Zaspa and others
M-STONE’s advantages
✅ Professional equipment: tools from leading brands ✅ Experience cutting large formats: slabs up to 160×320 cm ✅ Complex cut-outs: any geometry ✅ Edge finishing: grinding, polishing, bevels ✅ 45° mitre cuts: for perfect corners ✅ Natural stone: marble, travertine, granite
The current cost of work for your project can be calculated in the online calculators or confirmed by the manager: it depends on the material, the slab format and the condition of the substrate. The consultation is free.

About M-STONE
This material was prepared by the M-STONE team: 20 years of brand history, installation of large-format tile and natural stone in Kyiv and across Ukraine. The company is led by Oleg Dolynskyi. The recommendations describe the typical order of work; a specialist refines the solution for your project after a consultation.
Contact us
We will price your project
Send the dimensions and slab format: we will calculate the material and installation and suggest the timing.