Installing Large-Format Tile in a Bathroom: A Complete Guide from Experts
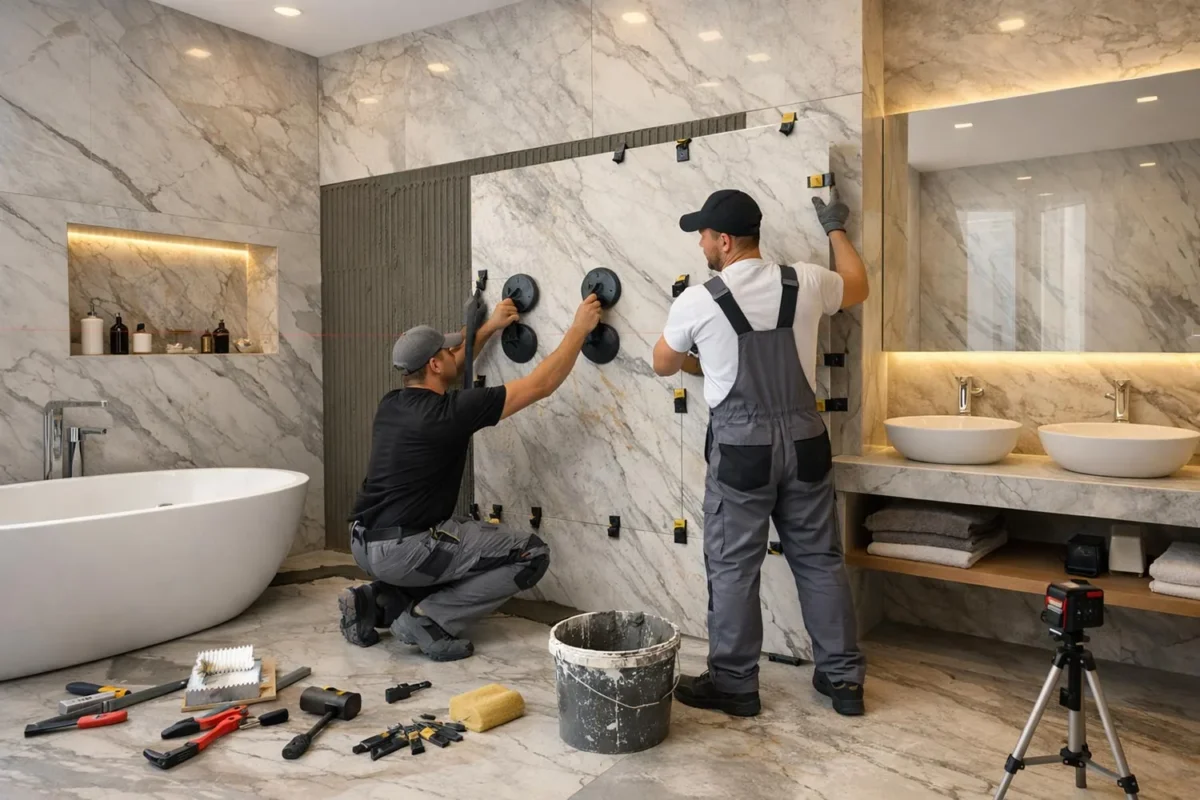
A large-format tile bathroom: a space of luxury and comfort
A bathroom is a special place in every home. It is where we start and end the day, where we look for relaxation and recovery. That is why finishing a bathroom deserves special attention, and large-format tile is the ideal solution for creating a space that impresses with its beauty and functionality.
M-STONE specialises in installing large-format tile, porcelain stoneware and natural stone in bathrooms in Kyiv and Ukraine. Our craftsmen create real masterpieces: bathrooms that resemble luxurious spas and five-star hotels.
Why is large-format tile ideal for a bathroom?
Hygiene comes first
A bathroom is an area of high humidity where bacteria and fungus find a favourable environment to multiply. Traditional small tile with numerous joints creates tens of metres of grout that darkens over time, absorbs dirt and becomes a source of mould.
Large-format tile changes the situation radically
- A 120×240 cm slab covers almost 3 m² with a single surface
- Instead of hundreds of joints, only a few minimal ones
- Epoxy grout is completely waterproof
- A smooth surface does not hold dirt and bacteria
The result: the bathroom stays clean and hygienic much longer, and cleaning takes just minutes.
Visual enlargement of the space
Most bathrooms in apartment buildings have a limited area, from 3 to 8 m². Large-format tile visually enlarges the space thanks to:
A minimum of joints Joints visually “chop up” the surface, making the room smaller. Large slabs create a monolithic effect.
A continuous pattern The veins of marble or travertine are not interrupted by joints, imitating a solid stone surface.
Reflection of light The polished or lappato surface of large slabs reflects light better, making the room lighter and more spacious.
Vertical orientation Rectangular slabs laid vertically visually raise the ceiling.
Premium-class aesthetics
Large-format tile turns an ordinary bathroom into a real spa space:
Imitation of natural stone Modern porcelain stoneware reproduces the texture of Calacatta, Statuario and Carrara marble, travertine and onyx perfectly. Large format makes the imitation as realistic as possible.
The book-match effect Mirrored laying of two slabs creates a symmetrical pattern characteristic of luxurious interiors.
A single style The same tile on the floor and walls creates a whole harmonious space without unnecessary transitions.
Practicality and durability
Moisture resistance Porcelain stoneware has water absorption of less than 0.05%: moisture simply does not penetrate the material.
Resistance to chemicals Cleaning products, bleaches, descalers: porcelain stoneware withstands everything without damage.
Heat resistance Hot water, steam, temperature swings: the tile does not react to thermal loads.
Wear resistance With correct use the surface lasts for decades without losing its look.
Choosing large-format tile for a bathroom
By size
For walls
- 60×120 cm: the optimal balance for most bathrooms
- 80×160 cm: for spacious bathrooms
- 120×240 cm: for creating monolithic surfaces
- 120×278 cm: for floor-to-ceiling walls with a single slab
For floors
- 60×60 cm: the classic large format
- 60×120 cm: a rectangle for visual enlargement
- 80×80 cm: for spacious bathrooms
- 90×90 cm: a premium format
- 120×120 cm: the maximum format for a bathroom floor
By type of surface
For floors (it must be anti-slip!)
- Matt: slip-resistance class R10
- Structured (Strutturato): class R10-R11
- Lappato: class R9-R10 (with caution)
Categorically not recommended for a bathroom floor
- Polished (Lucido): slippery when wet, dangerous!
For walls
- Polished: maximum gloss and a sense of depth
- Lappato: a compromise between gloss and practicality
- Satin: a soft elegant gloss
- Matt: for calm interiors
By design
Marble-look (the most popular choice)
White marble:
- Calacatta: white with golden-grey veins, luxury and status
- Statuario: the whitest with contrasting grey veins
- Carrara: white with soft grey veins, a classic
- Volakas: white with grey and beige veins, a more affordable option
Grey marble:
- Bardiglio: from light grey to dark
- Pietra Grey: graphite with thin white lines
Beige marble:
- Crema Marfil: a warm cream, a classic
- Botticino: light beige with brown veins
Black marble:
- Nero Marquina: black with white veins, contrast
- Sahara Noir: black with golden inclusions
Travertine-look
- Classic Travertino: beige with a characteristic texture
- Noce Travertino: a rich brown
- Silver Travertino: a cool grey
Onyx-look
- White Onyx: for backlit walls
- Honey Onyx: warm golden tones
- Green Onyx: exotic and luxurious
Concrete-look
- Light concrete: for minimalist interiors
- Dark concrete: an industrial style
- Streaked concrete: a decorative option
Monochrome
- White: maximum space and cleanliness
- Black: a dramatic contrast
- Grey: a universal modern choice
- Beige: warmth and cosiness
By manufacturer
Premium segment (Italy)
- Atlas Concorde
- Marazzi
- Florim
- Fiandre
- Fondovalle
- Ariostea
Mid segment
- Porcelanosa (Spain)
- Peronda (Spain)
- Pamesa (Spain)
- Golden Tile (Ukraine)
- Cersanit (Poland)
Bathroom zones and the specifics of cladding them
The shower cubicle / walk-in shower zone
A walk-in shower of large-format tile is a trend in modern design.
Installation specifics
- A mandatory floor slope to the drain (1-2%)
- Reinforced waterproofing (coating + tape)
- Structured tile on the floor (R11 minimum)
- A threshold-free entry or a minimal curb
Design solutions
- The same tile on the floor and walls: monolithic
- A contrasting floor: visual zoning
- Niches for cosmetics with lighting
- A travertine-look tile bench
M-STONE recommendations
- Light marble-look on the walls, structured porcelain stoneware on the floor
- A linear drain along the wall for better water removal
- A frameless glass partition for visual lightness
The bathtub zone
The bath panel Large-format tile on the bath panel looks much more striking than standard sizes:
- One or two slabs instead of dozens of small ones
- A minimum of joints
- The possibility of an invisible hatch for access to utilities
The wall behind the bath An accent wall behind the bath is the focal point of the interior:
- Book-match laying for symmetry
- Backlit onyx for a magical effect
- Niches with LED lighting
Shelves and ledges Shelves for cosmetics and bath ledges clad with the same tile create a whole look.
The washbasin zone
The wall behind the washbasin A large slab behind the washbasin is a practical and aesthetic solution:
- Easy cleaning of splashes
- The possibility of integrating a mirror
- Storage niches
The countertop A countertop under the washbasin made of porcelain stoneware or natural stone:
- A whole look with the wall cladding
- Moisture resistance
- Hygiene
Lighting LED lighting of the mirror, niches and countertop adds functionality and aesthetics.
The toilet zone (a combined bathroom)
The installation Cladding the installation box with large-format tile:
- A minimum of joints
- An invisible hatch for access to utilities
- A single style with the rest of the room
The wall behind the toilet An accent wall or a calm continuation of the general cladding.
The ceiling
Large-format tile on a bathroom ceiling is an exclusive solution for premium interiors:
- Complete watertightness
- A single material on all surfaces
- An impressive effect
Installation specifics
- A reinforced frame
- Special adhesive mixes
- Careful fixing until it hardens
The technology of installing large-format tile in a bathroom
Preparatory work
1. Dismantling
- Removing old tile
- Dismantling the plumbing fixtures
- Removing old waterproofing
- Taking away the debris
2. Utilities
- Checking the condition of the pipes
- Replacing them if needed
- Moving connection points (according to the project)
- Running electrics for lighting
3. Levelling surfaces
- Plastering walls (differences up to 2 mm per 2 m)
- Making a screed with a slope to the drain
- Checking with a laser level
4. Waterproofing
Waterproofing a bathroom is a critically important stage!
Coating waterproofing
- Applying 2-3 coats of polymer mastic
- Reinforcing corners and junctions with tape
- Taking it up the walls by at least 20 cm
- In the shower zone: the full height of the walls
Zones needing extra attention
- The junction of the floor with the walls
- Corners
- Pipe penetrations
- The drain zone
5. Priming
- Applying the primer after the waterproofing has dried
- Improving the adhesion of the adhesive
Laying the tile
The sequence of work
- Laying tile on the floor
- Cladding the walls (from the bottom up)
- Installing decorative elements
- Grouting the joints
Features of installation on the floor
- Forming a slope to the drain
- A structured surface for safety
- Minimal joints (1.5-2 mm)
Features of installation on walls
- A temporary support batten for the first row
- Fixing the levelling system until the adhesive hardens
- Book-match laying (according to the project)
Features of installation in a shower
- A seamless floor-to-wall transition (the same tile)
- Or a contrasting floor with clear zoning
- A slope to the drain of at least 1%
Grouting the joints
Recommended type of grout: epoxy
Advantages of epoxy grout
- Zero water absorption
- Resistance to mould and fungus
- Does not change colour over time
- Easy to clean
- A wide palette of colours
The grouting process
- Cleaning adhesive residues out of the joints
- Mixing the grout components
- Filling the joints
- Forming the joint profile
- Cleaning the surface with a special product
Installing plumbing and accessories
After grouting:
- Installing the bath / shower cubicle
- Installing the washbasin and mixers
- Connecting the toilet
- Installing accessories (a towel rail, hooks, shelves)
- Installing the mirror and lighting
- Installing sockets and switches
Marble in a bathroom
Popular varieties
- Bianco Carrara: the classic of luxury
- Calacatta: premium with golden veins
- Crema Marfil: a warm cosy option
- Nero Marquina: a contrasting modern choice
Features
- A mandatory water-repellent treatment
- Regular renewal of the protective coating
- Avoiding acidic products
- The possibility of restoration (grinding, polishing)
Application
- Walls (full cladding or accents)
- Floors (with an anti-slip finish)
- Countertops
- Shelves and ledges
Travertine in a bathroom
Advantages
- A warm natural look
- A comfortable texture
- An antique character
Features
- Filling the pores with mastic or keeping the natural texture
- A water-repellent treatment is mandatory
- An antiqued finish for floors (slip resistance)
Application
- Walls in a Mediterranean style
- Floors (antiqued)
- Finishing niches
Onyx in a bathroom
Onyx is the most striking material for a bathroom thanks to the possibility of backlighting.
Options for use
- A backlit wall behind the bath: a magical effect
- A backlit wall behind the washbasin instead of a mirror
- Decorative niches with LED lighting
- A countertop with built-in lighting
Popular colours
- White onyx: maximum light transmission
- Honey onyx: a warm romantic atmosphere
- Green onyx: exotic and luxurious
Lighting systems in a bathroom
LED lighting of niches
Niches in the walls with LED lighting:
- Functional storage
- A decorative effect
- Night lighting
Technology
- Forming a niche when preparing the walls
- Running electrical wiring
- Cladding the niche with tile
- Installing an LED strip around the perimeter
- A glass shelf (optional)
Mirror lighting
A mirror with LED lighting:
- Even lighting of the face
- A decorative effect
- A night-light function
Countertop lighting
An LED strip under the countertop:
- A “floating” countertop
- Soft lighting
- A stylish accent
Lighting onyx panels
Full backlighting of onyx is the peak of luxury:
- Even distribution of light
- Brightness control
- The ability to change colour (RGB)
- Control from a remote or a smartphone
Typical mistakes when cladding a bathroom
Mistake 1: insufficient waterproofing
Consequences: leaks to the neighbours, mould, destruction of the surface The M-STONE solution: comprehensive waterproofing with reinforcement
The current cost of work for your project can be calculated in the online calculators or confirmed by the manager: it depends on the material, the slab format and the condition of the substrate. The consultation is free.

About M-STONE
This material was prepared by the M-STONE team: 20 years of brand history, installation of large-format tile and natural stone in Kyiv and across Ukraine. The company is led by Oleg Dolynskyi. The recommendations describe the typical order of work; a specialist refines the solution for your project after a consultation.
Contact us
We will price your project
Send the dimensions and slab format: we will calculate the material and installation and suggest the timing.