Waterproofing and Substrate Preparation for Large-Format Tile: The Foundation of Quality Installation
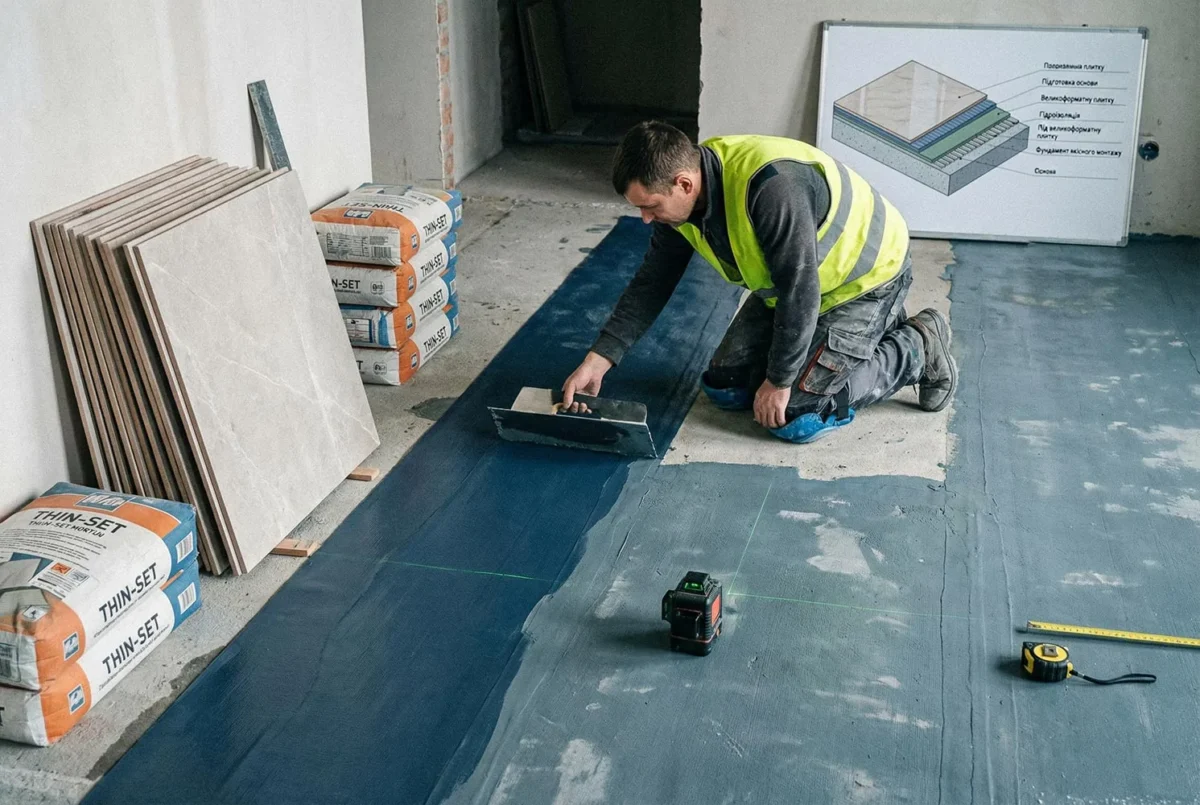
Substrate preparation: the invisible but most important stage
A flawless floor or wall of large-format tile is a result that everyone sees. But few people think about what lies beneath this beauty. Substrate preparation and waterproofing are the foundation on which the whole result rests. Mistakes at this stage inevitably lead to cracks, tile coming loose, leaks and other problems, the correction of which costs many times more than correct preparation.
M-STONE pays maximum attention to preparatory work, because we know that the quality of large-format tile installation depends 70% on the quality of substrate preparation. Our specialists master all the technologies of surface preparation and waterproofing to ensure a durable result.
Why substrate preparation is critically important for large formats
Features of large-format tile
Rigidity A large slab cannot follow the unevenness of the substrate the way small tile does. Any difference leads to voids under the tile.
Weight A 120×240 cm slab 10 mm thick weighs about 60 kg. This weight must be distributed evenly over the substrate.
Sensitivity to stress An uneven substrate creates point stresses that lead to cracks.
Minimal joints Joints of 1.5-2 mm do not compensate for movement of the substrate the way the wide joints of small tile do.
Consequences of poor preparation
Voids under the tile
- Local load when walking
- Tile cracks
- A “drum” sound when tapped
- Possible peeling
An uneven surface
- “Steps” between tiles
- Water collecting in low spots
- An unattractive look
- Tripping and injuries
Cracks in the substrate
- Are transferred to the tile
- Destruction of the grout
- Progressive damage
Substrate moisture
- Tile coming loose
- Destruction of the adhesive
- Mould and fungus
- Efflorescence (white bloom)
Types of substrates and their preparation
A concrete screed
The most common type of substrate for tile.
Requirements for the screed
- Strength: minimum M150, M200 recommended
- Flatness: differences up to 2 mm per 2 m (up to 1 mm for large formats)
- Moisture: no more than 4% (CM method)
- Age: at least 28 days after pouring
- Cleanliness: no dust, oils or old coverings
Checking strength
- A visual inspection (no cracks or delamination)
- Tapping (a uniform sound)
- A scratch test (it must not crumble)
- In case of doubt, a laboratory analysis
Checking flatness
- A laser level
- A 2-3 metre straightedge
- Checking in different directions
- Recording deviations
Checking moisture
- The CM method (a carbide hygrometer) is the most accurate
- A film test (cover with film for 24 hours)
- An electronic moisture meter
Preparing the screed
If the screed is of good quality:
- Cleaning off dust (a vacuum cleaner)
- Removing oil and paint stains (solvents)
- Priming with a deep-penetration primer
- Ready for laying
If there is unevenness up to 10 mm:
- Grinding off the protrusions
- Filling the depressions with a repair mix
- Priming
- Ready for laying
If there is significant unevenness (more than 10 mm):
- Making a self-levelling screed
- Drying (according to the instructions)
- Priming
- Ready for laying
If the screed is weak or damaged:
- Dismantling down to a strong substrate
- Making a new screed
- Curing for 28 days
- Checking and priming
Old tile
Whether you can lay on old tile depends on its condition.
When you can lay on old tile
- The tile is firmly held (does not “swell”)
- The surface is flat
- No cracks or chips
- The substrate under the old tile is strong
Preparation
- Checking strength (tapping)
- Dismantling individual loose tiles
- Filling the voids with adhesive or mortar
- Cleaning off grease and dirt
- Grinding the glaze (to improve adhesion)
- Applying a contact primer (concrete contact)
- Ready for laying
When dismantling is needed
- The tile is coming loose en masse
- Significant unevenness
- Cracks in the substrate under the tile
- Tile on an unstable substrate
Plasterboard and gypsum fibreboard
A popular substrate for walls.
Types of plasterboard
- Ordinary (GKL): for dry rooms
- Moisture-resistant (GKLV): for bathrooms and kitchens
- Fire-resistant (GKLO): for zones by a fireplace
Requirements
- A double layer for large-format tile
- A minimum profile pitch of 40 cm
- Rigidity of the structure
- A moisture-resistant type for wet zones
Preparation
- Checking the rigidity of the structure
- Taping the joints with mesh tape
- Filling the joints
- Priming with a deep-penetration primer
- Applying waterproofing (for bathrooms)
- Ready for laying
Limitations
- Maximum tile weight: 35-40 kg/m²
- Recommended formats: up to 60×120 cm
- For larger formats: reinforcing the structure
Cement-bonded particle board
A strong and moisture-resistant substrate.
Advantages
- High strength
- Moisture resistance
- Dimensional stability
- Suitable for large formats
Application
- Floors on joists
- Walls in frame houses
- Cladding of wooden structures
Preparation
- Checking the fixing of the boards
- Filling the joints with flexible sealant
- Priming
- Ready for laying
OSB (oriented strand board)
Needs special preparation because of its hygroscopicity.
Requirements
- OSB-3 or OSB-4 (moisture-resistant)
- Thickness of at least 18 mm
- A double layer is ideal
Preparation
- Checking the fixing
- Grinding the surface
- Treating with an antiseptic
- Waterproofing
- Installing cement-bonded board or reinforcing mesh
- Ready for laying
Limitations
- Not recommended directly for large formats
- Better to use as a sub-base under cement-bonded board
A wooden floor
The most difficult substrate for tile because of the movement of wood.
Problems with wood
- Hygroscopicity (swells and shrinks)
- Movement
- Squeaking
- Possible rot
Preparation, option 1 (full)
- Checking the condition of the boards and joists
- Replacing damaged elements
- Fixing squeaky boards
- Treating with an antiseptic
- Installing cement-bonded board (thickness 12-16 mm)
- Filling the joints
- Priming
- Ready for laying
Preparation, option 2 (a dry screed)
- Checking and repairing the floor
- Levelling with a fill
- Installing gypsum fibreboard in two layers
- Priming
- Ready for laying
Important: for large-format tile on a wooden substrate a flexible adhesive of class S2 is mandatory!
Waterproofing: protection from moisture
Where waterproofing is needed
Mandatory
- Bathrooms (the whole area)
- Shower cubicles
- Restrooms
- Pools
- Balconies and terraces
- Floors on the ground
Recommended
Types of waterproofing
Coating (liquid)
The most popular type for bathrooms.
Materials:
- Polymer mastics (acrylic, latex)
- Cement-polymer mixes
- Bitumen-polymer mastics
Advantages:
- Easy to apply
- A seamless coating
- The ability to handle complex shapes
- Good adhesion to the substrate and the adhesive
Application technology:
- Cleaning and priming the substrate
- Treating corners and junctions (reinforcing tape)
- Treating pipe penetrations (collars)
- Applying the first coat (horizontal strokes)
- Drying (according to the instructions)
- Applying the second coat (vertical strokes)
- Full drying
- Checking the continuity of the coating
Popular brands:
- Mapei Mapelastic
- Ceresit CR 166
- Litokol Coverflex
- Weber.tec 822
Roll (membrane)
For large areas and difficult conditions.
Materials:
- Bitumen-polymer membranes
- PVC membranes
- EPDM membranes
- Polyethylene films
Advantages:
- Guaranteed thickness
- Speed of laying on large areas
- Mechanical strength
Use:
- Terraces and balconies
- Floors on the ground
- Basement rooms
- Flat roofs
Penetrating
For concrete structures.
The principle of action: a chemical reaction with the concrete, forming crystals in the pores.
Advantages:
- Deep penetration
- Self-healing of cracks
- Durability
Use:
- Pools
- Tanks
- Basement rooms
Critical waterproofing zones
Corners (the junction of floor and wall)
- The most vulnerable place
- Reinforcing with tape is mandatory
- Forming a cove (a smooth transition)
Pipe penetrations
- Special collars
- An additional layer of waterproofing
- Careful treatment of junctions
The threshold (the junction with another room)
- Raising the waterproofing onto the threshold
- Protection against water flowing across
The drain (the outlet)
- A tight junction with the drain
- Additional reinforcement
- Checking watertightness
Checking the quality of the waterproofing
A visual check
- Continuity of the coating
- No gaps
- An even thickness
- The quality of corner treatment
A water penetration test
- Filling the space with water for 24 hours
- Checking the neighbouring rooms
- Done before the tile is laid!
Levelling surfaces
Self-levelling mixes (self-levelling floors)
Types
- Thin-layer (2-10 mm): finish levelling
- Thick-layer (10-50 mm): rough levelling
- Fast-setting: laying tile after 3-4 hours
Technology
- Preparing the substrate (cleaning, priming)
- Installing beacons (if needed)
- Preparing the mix (a mixer)
- Pouring and spreading
- Rolling with a spiked roller (removing air)
- Drying according to the instructions
Popular brands
- Ceresit CN 68, CN 76
- Mapei Ultraplan
- Knauf Boden
Plastering walls
Types
- Cement-sand: for damp rooms
- Gypsum: for dry rooms
- Cement-lime: universal
Requirements for large-format tile
- Strength of at least M100
- Flatness up to 3 mm per 2 m
- Full drying
- Priming
Skim coat
Application
- Filling small unevenness
- Preparing plasterboard
- Finish levelling
Important: tile does not need a perfectly smooth skim coat; flatness is enough.
Priming: a mandatory stage
Functions of the primer
Improving adhesion It creates an intermediate layer between the substrate and the adhesive.
Strengthening the substrate It penetrates the pores and binds the particles.
Regulating absorption It prevents excessive absorption of water from the adhesive.
Dust binding It binds dust on the surface.
Types of primers
A deep-penetration primer
- For porous substrates (concrete, plaster)
- Penetrates to a depth of up to 10 cm
- Strengthens and binds dust
A contact primer (concrete contact)
- For smooth surfaces (old tile, paint)
- Creates a rough surface
- Contains quartz sand
A universal primer
- For most surfaces
- Medium penetration
- Wide application
Priming technology
- Cleaning dust off the surface
- Preparing the primer (if a concentrate)
- Applying with a roller or brush
- An even coating without gaps
- Drying (usually 2-4 hours)
- A second coat if needed
- Laying the tile within 24 hours
Expansion joints
Why they are needed
Materials expand and contract with changes in temperature and humidity. Expansion joints compensate for these movements, preventing cracks.
Where to make them
Perimeter joints
- Around the whole perimeter of the room
- Where it meets walls, columns, thresholds
- Width 5-10 mm
- Covered by the skirting
Intermediate joints
- Every 25-30 m² (for interior work)
- Every 9-12 m² (for exterior work)
- Along the lines of existing expansion joints of the substrate
Joints in doorways
- Between different rooms
- Under the door leaf
- Covered by a threshold
Filling expansion joints
Flexible sealant
- Silicone
- Polyurethane
- Hybrid
Special profiles
- Metal
- Plastic
- Rubber
What the cost of preparatory work depends on
The price depends on:
- The type and condition of the substrate
- The required volume of work
- Materials (primer, waterproofing, mixes)
- The area of the room
- The difficulty of access
For an exact calculation contact M-STONE!
Contact information
M-STONE: professional preparation for tile
📞 Phones: +38 068 100 27 96, +38 050 914 18 99 📧 Email: [email protected] 🌐 Website: https://mstone.ua/
Social media
- Instagram: https://www.instagram.com/mstone_kiev/
- Facebook: https://www.facebook.com/mstone.kyiv/
- YouTube: https://www.youtube.com/@M-Stone_Kyiv/
Geography of work
Kyiv: all districts Kyiv region: Brovary, Irpin, Bucha, Vyshhorod, Vyshneve, Boiarka, Kozyn, Koncha-Zaspa and others
M-STONE’s advantages
✅ A comprehensive approach: preparation + laying in one pair of hands ✅ Substrate diagnostics: identifying all problems before work begins ✅ Quality materials: primers, waterproofing and mixes of leading brands ✅ Guarantee: on preparatory work and laying ✅ Transparency: a detailed estimate with a justification of every item
The current cost of work for your project can be calculated in the online calculators or confirmed by the manager: it depends on the material, the slab format and the condition of the substrate. The consultation is free.

About M-STONE
This material was prepared by the M-STONE team: 20 years of brand history, installation of large-format tile and natural stone in Kyiv and across Ukraine. The company is led by Oleg Dolynskyi. The recommendations describe the typical order of work; a specialist refines the solution for your project after a consultation.
Contact us
We will price your project
Send the dimensions and slab format: we will calculate the material and installation and suggest the timing.