Large-Format Tile for a Terrace and Outdoors: Frost Resistance, Installation and Care
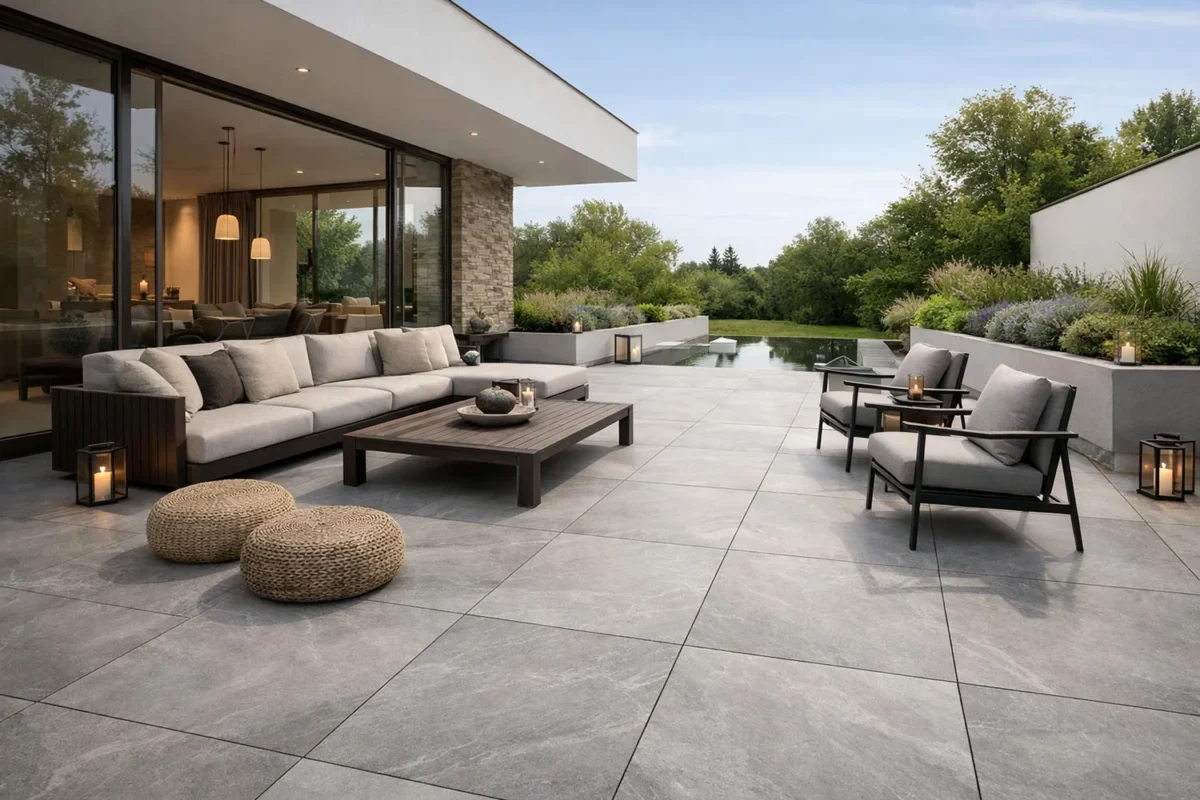
A large-format tile terrace: a continuation of the interior under the open sky
Modern design trends strive for unity of interior and exterior space. A terrace, a balcony or the area by a pool becomes a full continuation of the living space, and large-format tile plays a key role in creating this harmony. The same material on the floor of the living room and the terrace erases the boundary between “inside” and “outside”, creating a feeling of a single boundless space.
M-STONE is an expert in laying large-format tile outdoors in Kyiv and Ukraine. We know all the nuances of exterior installation and guarantee the durability of the surface in the most difficult climatic conditions.
Temperature swings
- Winter: down to -25°C (in some years down to -30°C)
- Summer: up to +40°C in the sun
- Daily swings: up to 20°C in spring and autumn
- Annual range: more than 60°C
Humidity and precipitation
- Rain throughout the year
- Snow and ice in winter
- Freeze-thaw cycles (up to 100 a year)
- Puddles and standing water
Solar radiation
- UV rays (colour fading)
- Surface heating in summer (up to +60°C on dark materials)
- Thermal expansion
Mechanical impacts
- Garden furniture
- Planters with plants
- A grill and a barbecue
- Children’s games
- Cars (for driveways)
Requirements for outdoor materials
Frost resistance The ability to withstand freeze-thaw cycles without destruction. Determined by the number of cycles (at least 50, better 100+).
Water absorption The less water a material absorbs, the lower the risk of destruction when it freezes. For outdoors: below 0.5%, ideally below 0.1%.
Slip resistance A wet surface must not be slippery. Minimum class R10, R11 recommended.
UV resistance The colour must not fade in the sun over years of use.
Bending strength Endurance under mechanical loads. Increased values are recommended for outdoors.
Heat resistance Resistance to heating by the sun and hot objects (a barbecue, a grill).
Types of large-format tile for outdoors
Porcelain stoneware 20 mm thick
A special series of porcelain stoneware for exterior use.
Characteristics
- Thickness: 20 mm (twice the standard)
- Water absorption: below 0.05%
- Frost resistance: 100+ cycles
- Slip resistance: R11-R12
- Bending strength: above 45 MPa
Advantages
- The possibility of laying on gravel or supports without adhesive
- Easy dismantling and reuse
- Increased strength under loads
- Ideal frost resistance
Formats
- 60×60 cm: the most popular
- 60×120 cm: for elongated spaces
- 80×80 cm: for large terraces
- 90×90 cm: a premium format
- 45×90 cm: a rectangular option
Popular designs
- Stone-look (slate, granite, travertine)
- Concrete-look
- Wood-look
- Monochrome
Standard porcelain stoneware (10-12 mm)
Ordinary porcelain stoneware can also be used outdoors provided it is installed correctly.
Requirements
- Water absorption: below 0.1%
- Frost resistance: confirmed by the manufacturer
- An anti-slip surface (matt, structured)
- Laying on adhesive on a concrete substrate
Limitations
- Only on a stable concrete substrate
- A slope for draining water is mandatory
- Quality grout for the joints
- Expansion joints every 3-4 metres
Natural stone
Natural stone is a classic solution for exteriors.
Granite
- The strongest and most durable
- Minimal water absorption
- A variety of colours
- Ideal for high loads
Travertine
- A warm natural look
- Does not heat up in the sun
- Pleasant to walk on barefoot
- Needs a water-repellent treatment
Slate
- A unique layered texture
- Natural slip resistance
- A wide palette of shades
- Resistance to weather
Sandstone
- Warm natural shades
- Good slip resistance
- Needs a protective treatment
- Average durability
Methods of laying large-format tile outdoors
Method 1: on adjustable supports (20 mm slabs)
The most modern and practical method.
The principle: slabs are laid on plastic adjustable supports without adhesive and grout. A gap of 4-5 mm is left between slabs to drain water.
Advantages
- Fast installation without “wet” processes
- The possibility of easy dismantling
- Access to utilities under the tile
- Ideal water drainage
- Compensation for unevenness of the substrate (adjusting the height of the supports)
- No cracks from temperature deformation
The substrate
- A concrete slab with a slope
- Compacted gravel
- Old tile (without dismantling)
- A waterproofing membrane
Types of supports
- Fixed height (10-20 mm)
- Adjustable (20-300 mm and more)
- With slope correctors
- With sound-absorbing pads
Method 2: on a gravel bed (20 mm slabs)
A simple and economical method.
The principle: slabs are laid directly on a compacted gravel bed.
Substrate preparation
- Removing the soil to a depth of 15-20 cm
- Geotextile to prevent growth through
- A 10-15 cm layer of crushed stone
- Compacting with a plate compactor
- A levelling layer of fine gravel 3-5 cm
- Laying the slabs
Advantages
- Economical
- Simple to lay
- Natural water drainage
- No cracks
Limitations
- Slabs may shift slightly over time
- Plants growing in the joints
- Not suitable for heavy load
Method 3: on adhesive on a concrete substrate
A classic method for a permanent surface.
The principle: the tile is bonded to a concrete screed with a special frost-resistant adhesive.
Requirements for the substrate
- A concrete screed of at least M200
- A slope away from the building of 1-2%
- Concrete age of at least 28 days
- Waterproofing (desirable)
- Expansion joints in the concrete
Choosing the adhesive
- Class C2S1 or C2S2 (flexible)
- Frost resistance (at least F50)
- Suitable for large formats
Grout
- Flexible frost-resistant
- Or open joints filled with sand
Expansion joints
- Every 3-4 metres
- Around the perimeter (junction with walls)
- Filled with flexible sealant
Areas of use for large-format tile outdoors
A terrace
Features
- A junction with the house
- A canopy or pergola is possible
- Furniture for relaxing
- Covering in winter is possible
M-STONE recommendations
- The same material as inside (visual unity)
- A slope away from the house of 1-2%
- An anti-slip surface R10-R11
- Light shades (heat up less)
- Laying on supports or adhesive
The pool area
Features
- Constant humidity
- Walking barefoot
- Sun loungers and furniture
- Contact with chlorinated water
M-STONE recommendations
- A structured surface R11-R12
- Light shades (do not heat up)
- Special pool copings
- A slope away from the pool to drain water
- Travertine is an ideal choice (warm, not slippery)
Garden paths
Features
- An elongated shape
- Different widths (60-120 cm)
- Integration with the landscape
- The possibility of lighting
M-STONE recommendations
- Format 60×60 or 60×120 cm
- Laying on gravel or supports
- Lighting with built-in LED fixtures
- Combination with lawn or gravel
A parking area / driveway
Features
- The load of cars
- Oil and fuel stains
- Intensive use
M-STONE recommendations
- 20 mm tile on a concrete substrate
- An increased strength class
- A chemically resistant surface
- Dark shades (more practical)
- A reinforced concrete substrate (at least M300)
A balcony / loggia
Features
- Limited space
- Load on the structure
- Waterproofing is critical
- The junction with the apartment
M-STONE recommendations
- Light tile (10-12 mm or thin porcelain stoneware of 6 mm)
- The same material as in the room
- Reinforced waterproofing
- A slope to the drainage
Stairs and a porch
Features
- Vertical and horizontal surfaces
- An increased risk of slipping
- Intensive use
- The effect of snow and ice
M-STONE recommendations
- A structured surface R11-R12
- A nosing (the overhang of the step) with anti-slip grooves
- Heating of the steps (optional)
- Handrails for safety
The installation technology by M-STONE
Installation on adjustable supports
Stage 1: substrate preparation
- Checking the flatness and slope of the concrete slab
- Cleaning off dirt and debris
- Waterproofing (if needed)
- Marking the position of the supports
Stage 2: installing the supports
- Arranging supports at the slab corners
- Adjusting the height by level
- Installing slope correctors
- Checking the horizontal with a laser level
Stage 3: laying the slabs
- Laying slabs on the supports
- Checking flatness
- Keeping an equal gap (4-5 mm)
- Cutting the edge slabs
Stage 4: finishing work
- Installing edge profiles
- Closing the perimeter (skirting or profile)
- Cleaning
Installation on adhesive
Stage 1: substrate preparation
- Checking the concrete for strength and moisture
- Repairing cracks and defects
- Making a slope (if needed)
- Cutting expansion joints
- Waterproofing
- Priming
Stage 2: laying the tile
- Marking and a trial layout
- Preparing the adhesive
- Applying adhesive to the substrate and the tile
- Laying with levelling
- Checking the level
Stage 3: grouting
- Cleaning the joints (after 24-48 hours)
- Filling with flexible grout
- Or filling with sand (open joints)
- Forming expansion joints with sealant
Stage 4: finishing work
- Cleaning the surface
- A water-repellent treatment (for natural stone)
- Installing accessories (lights, drainage)
Caring for outdoor tile
Regular care
Sweeping
- Regularly removing leaves, sand, dirt
- Preventing debris from accumulating in the joints
Washing
- Periodic washing with water from a hose
- Using a pressure washer (carefully!)
- Neutral cleaning products when needed
Seasonal care
Spring
- Thorough cleaning after winter
- Checking the condition of joints and tile
- Removing efflorescence (white bloom)
- Renewing the water-repellent treatment (for stone)
Summer
- Ordinary care
- Removing stains from the grill and food
- Care of plants in the joints (when laid on gravel)
Autumn
- Regularly removing leaves
- Cleaning drainage elements
- Preparing for winter
Winter
- Careful snow removal (a plastic shovel)
- Avoiding metal scrapers
- Limited use of de-icing agents (sand is better)
- Timely removal of ice
Dealing with typical problems
Moss and algae
- Special removal products
- Improving water drainage
- A water-repellent treatment of the surface
Efflorescence (white bloom)
- Efflorescence removers
- Identifying the cause (incorrect drainage)
- A water-repellent treatment after cleaning
Rust stains
- Special rust removers
- Eliminating the source (metal objects)
Grease and oil stains
- Special degreasers
- Rinsing with plenty of water
- For stubborn stains: compresses with an absorbent
What the cost of laying tile outdoors depends on
The price depends on:
- The type of tile (porcelain stoneware, stone)
- The method of laying (supports, adhesive, gravel)
- The area of the surface
- The complexity of the geometry
- The condition of the substrate
- The need for preparatory work
- Additional elements (copings, stairs, lighting)
To calculate the cost contact M-STONE!
Contact information
M-STONE: professional laying of tile outdoors
📞 Phones: +38 068 100 27 96, +38 050 914 18 99 📧 Email: [email protected] 🌐 Website: https://mstone.ua/
Social media
- Instagram: https://www.instagram.com/mstone_kiev/
- Facebook: https://www.facebook.com/mstone.kyiv/
- YouTube: https://www.youtube.com/@M-Stone_Kyiv/
Geography of work
Kyiv: all districts Kyiv region: Brovary, Irpin, Bucha, Vyshhorod, Vyshneve, Boiarka, Kozyn, Koncha-Zaspa, Ukrainka, Obukhiv and others
M-STONE’s advantages for outdoor work
✅ Experience of exterior installation: we know all the nuances of climatic effects ✅ Work with 20 mm tile: on supports and on adhesive ✅ Natural stone: granite, travertine, slate ✅ Modern technologies: adjustable supports, LED lighting ✅ A frost-resistance guarantee: materials and technologies for Ukraine ✅ Comprehensive solutions: terraces, pools, paths, stairs
The current cost of work for your project can be calculated in the online calculators or confirmed by the manager: it depends on the material, the slab format and the condition of the substrate. The consultation is free.

About M-STONE
This material was prepared by the M-STONE team: 20 years of brand history, installation of large-format tile and natural stone in Kyiv and across Ukraine. The company is led by Oleg Dolynskyi. The recommendations describe the typical order of work; a specialist refines the solution for your project after a consultation.
Contact us
We will price your project
Send the dimensions and slab format: we will calculate the material and installation and suggest the timing.