Frequently Asked Questions About Large-Format Tile and Natural Stone: Answers from M-STONE Experts
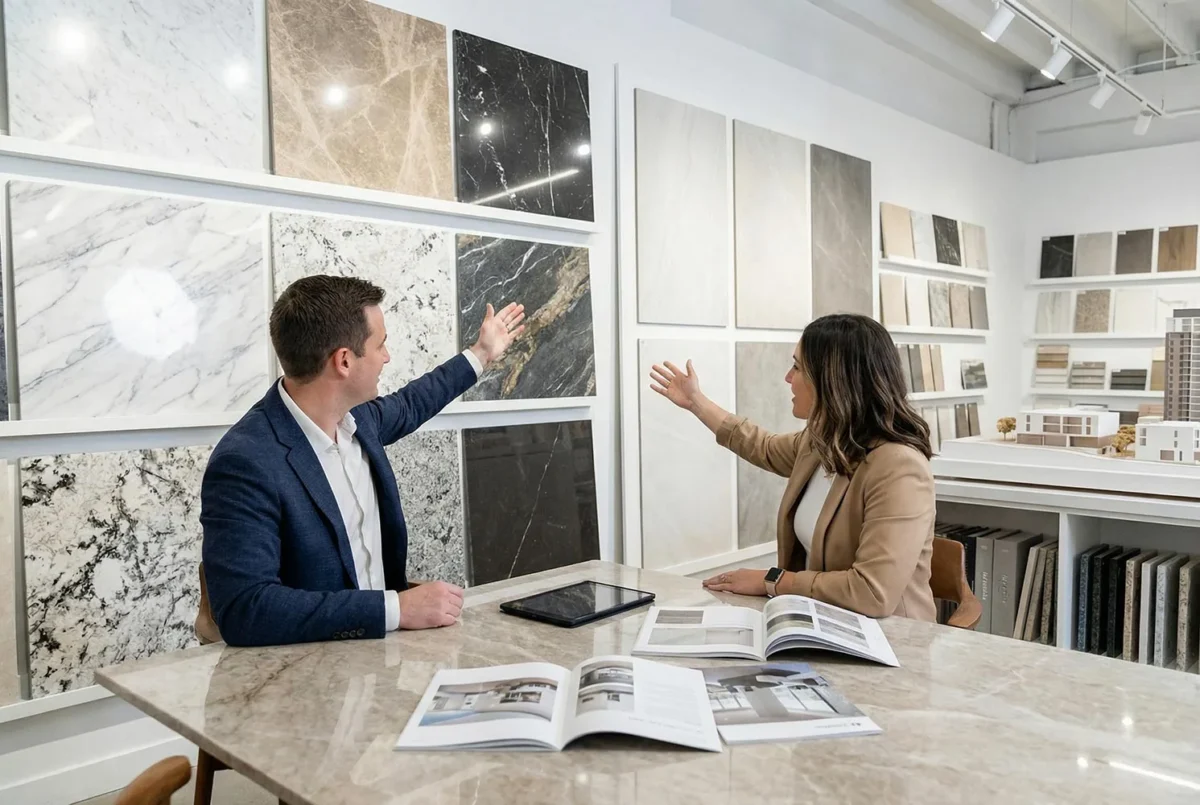
Everything you wanted to know but were afraid to ask
Over the years of working with large-format tile and natural stone we have answered thousands of questions from our clients. Some questions come up again and again, which is understandable: choosing facing materials and installing them is a serious decision that needs information. In this article we have collected the most common questions and give detailed, honest answers without marketing embellishment.
M-STONE is always ready to answer your questions in person. But this article will help you get the basic information and prepare for a consultation.
Section 1: Choosing a material
Question 1.1: Which is better, porcelain stoneware or natural stone?
Answer
There is no single answer; it all depends on your priorities.
Choose porcelain stoneware if
- Practicality matters more than uniqueness
- Your budget is limited
- The room has a heavy load (a kitchen, a corridor)
- You do not want to spend time on care
- You need large formats (over 120×240 cm)
Choose natural stone if
- You value uniqueness and natural beauty
- You are ready for regular care
- You want to invest in status and prestige
- The possibility of restoration is important
- It is a premium-class project
A compromise: use stone for accents (a fireplace, an island, a wall) and porcelain stoneware for practical zones.
Question 1.2: Does modern marble-look porcelain stoneware differ from real marble?
How to tell them apart
- Repetition of the pattern (ceramics repeat, although modern collections have 50+ variations)
- Tactile sensations (stone feels more alive)
- The edge (the structure of the material is visible)
- Depth of colour (stone is deeper)
- Surface temperature (stone is colder)
When it is critical
- On close inspection (countertops, small surfaces)
- For connoisseurs of real materials
- In premium interiors
When it does not matter
- Flooring in large rooms
- Bathroom walls
- Commercial sites
Question 1.3: Which tile format is best for my apartment?
Answer
It depends on the size of the room and your aesthetic preferences.
Recommendations by room area
| Room area | Recommended format |
|---|---|
| Up to 4 m² | 30×60, 60×60 cm |
| 4-10 m² | 60×60, 60×120 cm |
| 10-20 m² | 60×120, 80×80, 120×120 cm |
| 20-50 m² | 120×120, 120×240 cm |
| Over 50 m² | 120×240 cm and larger |
But there are nuances
- A large format in a small space can look grand and stylish
- Or, on the contrary, it can overwhelm the space
- The design also matters (bright or neutral)
An M-STONE tip: contact us with the room plan and we will help you choose the best format.
Question 1.4: Can large tile be laid in a small bathroom?
Answer
Yes, and it often looks wonderful!
Advantages of a large format in a small bathroom
- Fewer joints make the space feel larger
- A modern, clean look
- Easier to clean
Limitations
- More waste when cutting
- Harder installation (little room to manoeuvre)
- An experienced craftsman is needed
The best format for a 3-5 m² bathroom
- 60×120 cm: ideal
- 120×120 cm: possible, but many cuts
- 120×240 cm: difficult, but striking
Question 1.5: Which tile is suitable for underfloor heating?
Mandatory requirements
- Water absorption below 3% (better, below 0.5%)
- A mark ‘for underfloor heating’ (desirable)
Recommendations
- A thickness of 8-10 mm (not too thick)
- A matt or satin surface
- Neutral colours
Critically important: success is determined not by the tile but by the right adhesive (flexible S1/S2) and the laying technology!
Section 2: Installation and laying
Question 2.1: Can large tile be laid on your own?
Answer
In theory yes. In practice we do not recommend it.
Why laying a large format yourself is risky
- The weight of the tile (60×120 cm weighs 15-20 kg)
- At least 2 people are needed
- Special equipment is needed (suction cups, levelling systems)
- Critical accuracy of base preparation
- Experience working with large formats
When you can try it yourself
- Tile up to 60×60 cm
- A small area (up to 5-10 m²)
- You have experience laying tile
- You are ready for possible mistakes
An M-STONE recommendation: leave formats of 60×120 cm and larger to professionals. Saving on labour can end in the loss of expensive tile.
Question 2.2: How long does laying tile take?
Answer
It depends on many factors.
Approximate timings (work by a crew of 2-3 people)
| Type of work | Productivity |
|---|---|
| Substrate preparation | 1-3 days (depending on condition) |
| Waterproofing | 1-2 days |
| Laying tile (standard) | 10-15 m²/day |
| Laying tile (large format) | 8-12 m²/day |
| Laying tile (complex cut-outs) | 5-8 m²/day |
| Grout | 15-25 m²/day |
Example: a 6 m² bathroom (floor + walls ~25 m²):
- Preparation: 1-2 days
- Waterproofing: 1 day
- Laying: 2-3 days
- Grouting: 1 day
- Total: 5-7 working days
Factors that increase the time
- Complex room geometry
- Many cut-outs (pipes, sockets)
- Diagonal laying
- Book-match laying
- Natural stone
Question 2.3: What should the joint width be for large-format tile?
Answer
Minimum joints
- Theoretical minimum: 1.5 mm
- Practical minimum: 2 mm
- Recommended: 2-3 mm
Why not less
- Space is needed for the grout
- Compensation for micro-movements
- Preventing chips from thermal expansion
- Manufacturers recommend a minimum of 2 mm
For rectified tile
- 1.5-2 mm: possible with a perfect base
- 2 mm: optimal
For non-rectified tile
- 3-4 mm minimum
Question 2.4: What is rectified tile and is it needed?
Answer
Rectified tile is tile with trimmed edges for exact dimensions.
Differences
| Parameter | Rectified | Non-rectified |
|---|---|---|
| Edges | Straight, at 90° | Slightly bevelled |
| Size accuracy | ±0.3 mm | ±1-2 mm |
| Minimum joint | 1.5-2 mm | 3-4 mm |
| Cost | Higher | Lower |
When rectification is mandatory
- Minimal joints (under 3 mm)
- Large formats
- A modern minimalist interior
- Professional laying
When it is not critical
- A rustic style
- Joints of 4+ mm
- Stone-look tile with deliberate imperfections
Question 2.5: Is waterproofing needed in a bathroom if the tile is waterproof?
Answer
YES, absolutely!
Why tile does not replace waterproofing
- Joints (even epoxy ones) are a potential place for water to penetrate
- Junctions with plumbing
- Cracks (which can appear over time)
- Water gets under the tile through minor defects
Where water goes without waterproofing
- Into the screed
- Into the walls (brick, plasterboard)
- To the neighbours below
- Mould and fungus
Where waterproofing is mandatory
- The shower zone (floor + walls at least 20 cm)
- The bathtub zone
- Around the toilet (desirable)
- The whole perimeter of the floor (at least 10 cm up the walls)
An M-STONE recommendation: do not skimp on waterproofing! It prevents costly leak problems.
Question 2.6: What is a TLS and is it mandatory to use one?
Answer
A TLS (tile levelling system) is a device for bringing neighbouring tiles into one plane.
How it works
- The base is placed under the tile in the joint
- A wedge or cap presses the tiles to one level
- After the adhesive sets it is removed
When a TLS is mandatory
- Large-format tile (from 60×60 cm)
- Tile that may be warped
- A perfectly flat surface is important
When you can do without a TLS
- Small formats (up to 30×30 cm)
- A very experienced craftsman
- A budget renovation
An M-STONE recommendation: for large formats a TLS is the standard. The expense is minimal, and the result is a guaranteed flat surface.
Section 3: Budget and calculating materials
Question 3.2: How do you calculate the amount of tile with an allowance?
Answer
The basic formula: Quantity = Area × (1 + allowance factor)
Allowance factors
| Type of laying | Allowance |
|---|---|
| Straight laying | 5-7% |
| Offset laying | 7-10% |
| Diagonal laying | 10-15% |
| Herringbone | 15-20% |
| Complex geometry | 15-20% |
Example: a 10 m² bathroom, offset laying. 10 × 1.10 = 11 m² must be ordered.
Important
- Order all the tile from one batch (the shade!)
- Keep 2-3 tiles in case of repairs
- For large formats, round up to whole slabs
Question 3.3: Where can you save and where should you not?
Answer
You can save on
- The tile design (there are nice budget collections)
- Tile in utility rooms
- A less well-known brand (with good characteristics)
- Delivering it yourself
Do not save on
- Adhesive (only quality, and flexible for large formats)
- Grout (especially epoxy for the bathroom)
- Waterproofing
- The craftsmen’s work (expensive tile + poor installation = money thrown away)
- A TLS for large formats
The golden rule: it is better to have cheaper tile + quality materials and installation than expensive tile + savings on everything else.
Question 3.4: Why is natural stone more expensive than tile?
Answer
What makes up the price of natural stone
- Extraction: quarry work, equipment
- Transport: stone is heavy, often from other countries
- Processing: sawing blocks into slabs, polishing
- Uniqueness: limited reserves, rare stones
- Waste: up to 30-50% of the material is lost during processing
- Manual labour: many operations are done by hand
By comparison
- Porcelain stoneware is mass-produced on automatic lines
- The raw material is available and cheap
- A minimum of waste
- Standardised production
Section 4: Use and care
Question 4.1: How do you wash large tile correctly?
Answer
Daily care
- Dry cleaning (a vacuum cleaner, a mop)
- Damp cleaning with clean water
- A soft cloth or microfibre
Periodic cleaning
- A neutral tile detergent
- Dilution according to the instructions
- Rinsing with clean water after washing
Deep cleaning
- Special products for deep cleaning
- Treating the joints
- Removing stubborn dirt
What NOT to do
- Do not use abrasive products on polished tile
- Do not pour a lot of water (it gets into the joints)
- Do not use acid on natural stone
Question 4.2: How do you care for marble?
Answer
The main rules
- No acids! (Vinegar, lemon and bathroom products with acid leave matt marks)
- Remove spills immediately (marble is porous and absorbs liquids)
- Only special products (neutral pH, for stone)
- Regular water-repellent treatment (every 6-12 months)
- Soft cloths (no abrasive)
What to do about stains
- Organic (coffee, wine): a compress with hydrogen peroxide
- Grease: an acetone compress
- Etching (matt marks from acid): polishing or restoration
Question 4.3: Can cracked tile be repaired without replacing it?
Answer
It depends on the type of damage
Can be repaired
- Small chips on the edges (repair mixes, waxes)
- Surface scratches (polishing products)
- Cracks in natural stone (filling with resin)
Better to replace
- Deep cracks through the whole tile
- Delaminated tile
- Numerous chips
- Damage in a visible place
A recommendation: keep a spare of tile (2-3 pieces) for possible replacement in the future.
Question 4.4: Why has the grout turned yellow and how do you fix it?
Answer
Causes of yellowing/darkening
- Dirt (building up in the pores of cement grout)
- Mould (in wet zones)
- A chemical reaction (poor-quality grout)
- Time (natural ageing)
How to fix it
Cleaning:
- A steam cleaner
- Special products for joints
- Bleach (carefully, test it!)
Renewal:
- Joint paint (a temporary solution)
- Re-grouting (removing the old grout and applying new)
Prevention
- Epoxy grout (does not darken, does not go mouldy)
- A water-repellent treatment of cement grout
- Regular cleaning of the joints
An M-STONE recommendation: invest in epoxy grout and forget this problem for good.
Section 5: Technical questions
Question 5.1: Will the floor bear the weight of large-format tile?
Answer
The weight of the covering
- 10 mm porcelain stoneware: ~25 kg/m²
- 20 mm natural stone: ~50-55 kg/m²
- Adhesive: ~5-7 kg/m²
- Total: 30-60 kg/m²
Load-bearing capacity of floors
- A reinforced concrete slab: 400-800 kg/m²
- A wooden floor: 150-250 kg/m²
Conclusion: for reinforced concrete floors there are no problems. For wooden ones a consultation with a structural engineer is needed.
When caution is needed
- Old buildings
- Wooden floors
- Very thick stone over a large area
- Loggias and balconies
Question 5.2: Can tile be laid over old tile?
Answer
Yes, provided that
- The old tile holds firmly (it does not sound hollow)
- The surface is flat
- There are no significant defects
- Raising the floor level is acceptable
Technology
- Cleaning and degreasing
- Scoring or a bonding primer
- Flexible adhesive
- Laying the new tile
When you must NOT
- The old tile is delaminating
- Critical height (doors, threshold)
- The floor is uneven
- There are waterproofing problems (a bathroom)
For thin porcelain stoneware (3-6 mm): an ideal solution for laying over old tile, with a minimal rise in level.
Question 5.3: What is the minimum temperature for laying tile?
Answer
Temperature requirements
- Minimum: +5°C (air and base)
- Optimal: +15-25°C
- Maximum: +35°C
At low temperatures
- The adhesive does not gain strength
- Extended hardening time
- Risk of delamination
At high temperatures
- The adhesive dries too quickly
- Poor adhesion
- The base needs to be dampened
For winter work
- Heating the room
- Or special frost-resistant adhesives
- Holding the temperature for at least 2-3 days after laying
Question 5.4: How long must the screed dry before laying tile?
Answer
A cement-sand screed
- Minimum: 1 day per 1 mm of thickness (up to 40 mm)
- A 40 mm screed = 28-40 days
- Optimal: 28 days
Fast-setting mixes
- 24-72 hours (according to the manufacturer’s instructions)
- But full drying takes longer
How to check readiness
- Polyethylene film on the floor for 24 hours
- If there is condensation under the film, the screed is not ready
- A moisture meter (a maximum of 4% moisture)
Consequences of laying on a damp screed
- Tile coming loose
- Efflorescence (white bloom)
- Mould under the tile
- Destruction of the adhesive joint
Section 6: Specific situations
Question 6.1: Can large tile be used outdoors?
Answer
Yes, but with requirements
Characteristics of tile for outdoors
- Water absorption below 0.5%
- Frost resistance (the snowflake mark)
- A thickness of 20 mm (the standard for outdoors)
- Slip resistance of R11 and above
- UV resistance
Laying technology
- On adhesive (for small areas)
- On adjustable supports (for terraces)
- A quality frost-resistant adhesive
- A slope for water drainage
- Expansion joints
Limitations
- Polished tile: NO (slippery, a finish that is not frost-resistant)
- Too thin: NO (fragile)
Question 6.2: How do you deal with the slipperiness of polished tile?
Answer
Solution options
- Choose another surface:
- Matt
- Lappato
- Structured
- An anti-slip coating:
- Special products (applied to the surface)
- A temporary effect (it must be renewed)
- Mats and runners:
- In wet zones
- By the entrance
- Correct zoning:
- Polished in dry zones
- Matt/structured in wet ones
An M-STONE recommendation: do not lay polished porcelain stoneware in bathrooms, in kitchens by the sink, or in swimming pools. Choose a matt or structured surface.
Question 6.3: What should you do if the tile sounds hollow?
Answer
A hollow sound means: there are voids under the tile, so it is not fully bonded to the base.
Causes
- Incomplete coverage with adhesive
- The adhesive drying too quickly
- An uneven substrate
- The wrong adhesive
- Violation of the technology
What to do
If it is a small area (1-2 tiles):
- It can be left (if it is not a critical place)
- Or the tiles can be replaced
If it is a significant area:
- Adhesive injection (difficult, not always effective)
- Or dismantling and re-laying
The danger of voids
- Cracks under load
- Delamination over time
- Problems with underfloor heating (overheating)
Prevention
- Double application of adhesive
- Control during laying
- Professional installation
Question 6.4: How do you choose the grout colour?
Answer
Three approaches
1. Grout matching the tile
- The joints blend into the surface
- A monolithic effect
- Ideal for large formats
- For minimalism
2. Contrasting grout
- Emphasises the geometry
- An accent on the shape of the tile
- For small tile and mosaics
- Retro and loft styles
3. Grout 1-2 tones darker
- A compromise
- The joints are visible but not conspicuous
- Practical (dirt is less noticeable)
- A universal choice
For white tile
- White grout: clean, but it gets dirty quickly
- Light grey: more practical, visually similar
A tip: test the grout on a sample of tile before applying it!
Contact information
M-STONE: answers to all your questions
📞 Phones: +38 068 100 27 96, +38 050 914 18 99 📧 Email: [email protected] 🌐 Website: https://mstone.ua/
Social media
- Instagram: https://www.instagram.com/mstone_kiev/
- Facebook: https://www.facebook.com/mstone.kyiv/
- YouTube: https://www.youtube.com/@M-Stone_Kyiv/
Geography of work
Kyiv: all districts Kyiv region: Brovary, Irpin, Bucha, Vyshhorod, Vyshneve, Boiarka, Kozyn, Koncha-Zaspa and others All of Ukraine: travel to projects
M-STONE’s advantages
✅ Free consultations: we will answer all your questions ✅ Honest advice: we do not push what you do not need ✅ Experience: thousands of completed projects ✅ Transparency: we explain every stage ✅ A guarantee: we answer for our work
The current cost of work for your project can be calculated in the online calculators or confirmed by the manager: it depends on the material, the slab format and the condition of the substrate. The consultation is free.

About M-STONE
This material was prepared by the M-STONE team: 20 years of brand history, installation of large-format tile and natural stone in Kyiv and across Ukraine. The company is led by Oleg Dolynskyi. The recommendations describe the typical order of work; a specialist refines the solution for your project after a consultation.
Contact us
We will price your project
Send the dimensions and slab format: we will calculate the material and installation and suggest the timing.