Repair and Restoration of Tile and Natural Stone Surfaces
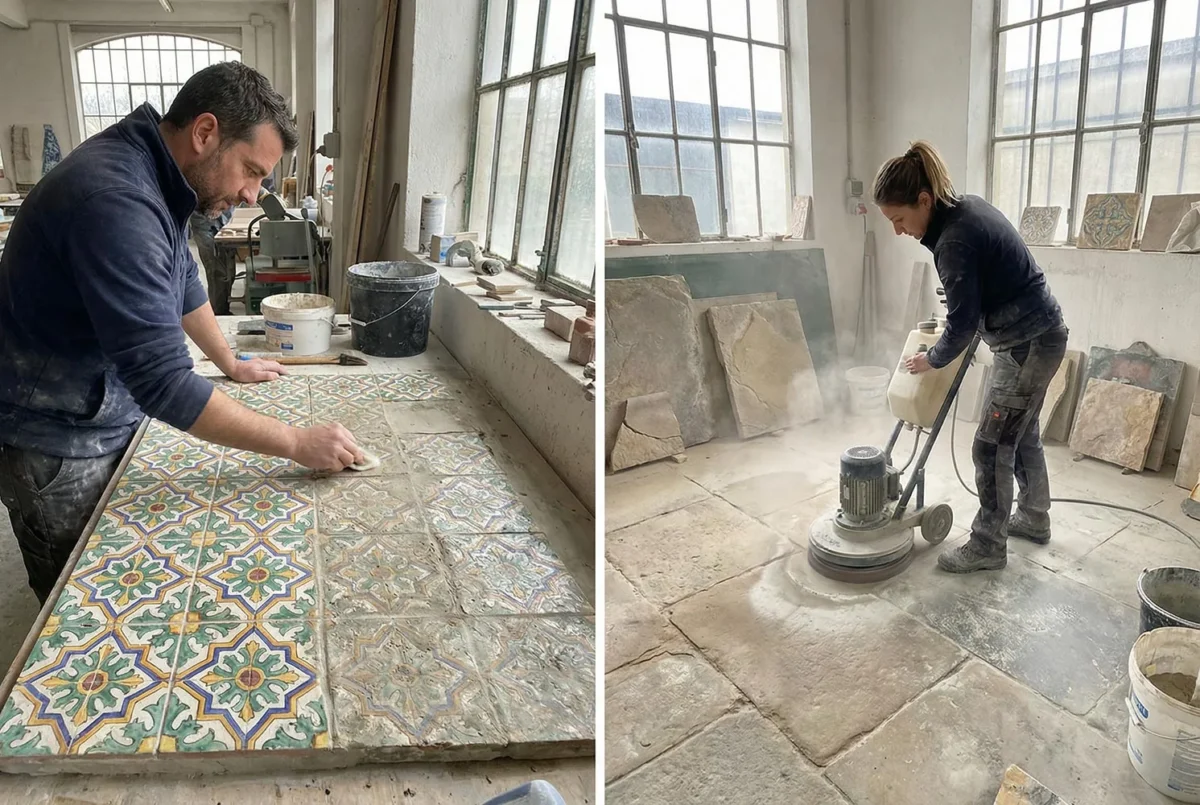
When beauty can be restored rather than replaced
Even the highest-quality tile and natural stone may over time need repair or restoration. Cracks, chips, stains, a dulled surface, destroyed grout: none of this is a reason to replace the whole surface. Professional restoration can bring back the original beauty of the materials and extend their service life by decades. The cost of restoration is usually considerably lower than full replacement, and the result is just as impressive.
M-STONE provides a full range of repair and restoration services for tile and natural stone surfaces. We restore floors, walls, countertops, stairs and other surfaces, returning their original shine and functionality.
Typical surface problems and their causes
Problems with porcelain stoneware and tile
Tile cracks
Reasons:
- A blow from a heavy object
- Voids under the tile (incomplete coverage with adhesive)
- Deformation of the base (settlement of the house, foundation movement)
- Temperature changes (incorrect laying over underfloor heating)
- Point load (heavy furniture without pads)
Visual signs:
- A visible crack on the surface
- A ‘spider web’ of fine cracks
- A crack through several tiles (a problem with the base)
Chips in the tile
Reasons:
- Falling heavy or sharp objects
- Knocks when moving furniture
- A factory defect
- Incorrect cutting during laying
Where they occur:
- The edges of the tile (most often)
- Corners
- The surface (less often)
Tile coming loose
Reasons:
- Poor-quality adhesive
- Violation of the laying technology
- No priming
- Laying on an unprepared base
- Substrate moisture
- No expansion joints
Signs:
- A “drum” sound when tapped
- Lifting of the tile
- Cracks around the perimeter of the tile
Destroyed grout
Reasons:
- Poor-quality grout
- Shrinkage of the grout
- Washing out by water
- Mechanical damage
- Mould and fungus
- Chemical action
Consequences:
- An aesthetic flaw
- Water getting under the tile
- Accumulation of dirt
- A health hazard (mould)
Stains and contamination
Reasons:
- Spilled liquids
- Rust from metal objects
- Cement bloom
- Construction dirt
- Incorrect care
Problems with natural stone
Scratches and scuffs
Reasons:
- Mechanical wear
- Sand and abrasive particles
- Moving furniture
- Heels and shoes
The most vulnerable:
- Polished marble
- Polished travertine
- Onyx
Etching (matt marks from acids)
Typical of: marble, travertine, limestone (carbonate stones)
Reasons:
- Contact with acids (lemon, vinegar, wine, tomatoes)
- Acidic cleaning products
- Acid rain (for exterior surfaces)
Appearance:
- Matt marks on the polish
- A rough surface
- ‘Burnt-out’ areas
Stains and discolouration
Types of stains:
- Organic (coffee, tea, wine, food)
- Oily (oil, grease, cosmetics)
- Inorganic (rust, copper)
- Biological (mould, algae)
Reasons:
- The porosity of the stone
- No water-repellent treatment
- Late removal of dirt
- Incorrect care
Cracks and chips
Reasons:
- Impacts
- Natural defects of the stone
- Thermal shock
- Deformation of the base
- Incorrect laying
Destruction of joints and connections
Reasons:
- Movement of the stone
- Poor-quality grout
- Moisture
- Temperature swings
Efflorescence (white bloom)
Typical of: exterior surfaces, wet zones
Reasons:
- Salts coming out of the concrete or stone
- Excess moisture
- Water penetrating from behind
Methods of restoring porcelain stoneware and tile
Replacing damaged tiles
When it is used
- Cracks running through the whole tile
- Significant chips
- Complete delamination
Technology
Step 1: removing the damaged tile
- Removing the grout around the perimeter (an oscillating tool or a knife)
- Drilling holes in the centre of the tile
- Carefully knocking out fragments from the centre to the edges
- Cleaning the old adhesive off the base
Step 2: preparation
- Checking the base (whether there are cracks)
- Repairing the base (if necessary)
- Priming
- Selecting a replacement tile
Step 3: laying the new tile
- Applying adhesive
- Setting the tile flush with its neighbours
- Levelling
- Waiting for the adhesive to harden
Step 4: grouting
- Grouting the joints
- Cleaning
Important
- Keep a spare of tile (preferably from the same batch)
- Choose adhesive and grout similar to the originals
- Keep to the joint width
Repairing chips and cracks without replacement
When it is used
- Small chips on the edges
- Surface cracks
- When there is no spare tile
Materials
- Epoxy filler for tile
- Two-component repair compounds
- Coloured waxes
- Special repair kits
Technology
For chips:
- Cleaning and degreasing the chip
- Matching the colour of the repair mix (mixing pigments)
- Applying the mix with a slight excess
- Levelling
- Sanding after it hardens
- Polishing (if needed)
For cracks:
- Cleaning the crack
- Filling with an epoxy compound
- Removing the excess
- Polishing
Limitations
- Not suitable for major damage
- The repair may be noticeable
- A temporary solution for high-traffic zones
Re-grouting joints
When it is used
- Destruction of the grout
- Changing the colour of the joints
- Mould in the joints
- Dirty grout
Technology
Step 1: removing the old grout
- Mechanical removal (a special knife, an oscillating tool)
- Removal depth: at least 2/3 of the tile thickness
- Cleaning residues out of the joints
- A vacuum cleaner to remove dust
Step 2: preparation
- Rinsing the joints
- Drying
- If necessary, treating with an antifungal product
Step 3: new grout
- Applying the grout with a rubber float
- Filling the joints thoroughly
- Removing the excess
- Shaping the joint
- Cleaning the tile
An M-STONE recommendation: when re-grouting we recommend switching to epoxy grout, which will not darken, will not go mouldy and will last far longer.
Deep cleaning of tile
When it is used
- Stubborn dirt
- Construction dirt after renovation
- Cement bloom
- Rust
Products and methods
Cement bloom:
- Acidic cleaners (Mapei Keranet, Litokol Litonet)
- Apply to a dry surface
- Leave for the time given in the instructions
- Rinse off thoroughly with water
- Do NOT use on natural stone!
Grease contamination:
- Alkaline cleaners
- Degreasers
- Steam cleaning
Rust:
- Special rust removers
- Careful: they can damage some surfaces
Hardened grout on the tile:
- Mechanical removal (a plastic scraper)
- Chemical solvents (for epoxy)
- Do not use metal tools
Methods of restoring natural stone
Grinding and polishing
When it is used
- Scratches and scuffs
- Etching (acid stains)
- Loss of shine
- Irregularities at slab junctions
Types of grinding
Local grinding
- Treating individual damaged areas
- By hand or with small equipment
- For minor scratches and stains
Full grinding
- Treating the whole surface
- Professional equipment (planetary machines)
- For significant wear or widespread damage
- Removing a layer of 0.5-2 mm
Polishing technology
Step 1: coarse grinding (60-100 grit)
- Removing deep scratches
- Levelling the surface
Step 2: medium grinding (200-400 grit)
- Smoothing out marks
- Preparing for polishing
Step 3: fine grinding (800-1500 grit)
- Giving smoothness
- Preparing for the finish
Step 4: polishing (3000 grit + paste)
- Achieving the shine
- Crystallisation (for marble)
Crystallising marble: a chemical treatment that creates a protective layer and gives deep shine.
Advantages:
- Increasing the hardness of the surface
- A deep ‘wet’ shine
- Protection against dirt
- Durability
Removing stains from natural stone
Organic stains (coffee, tea, wine, food)
Method: a hydrogen peroxide poultice
- Soak a poultice material (white clay or paper pulp) with hydrogen peroxide (12%)
- Apply it to the stain in a layer of 5-10 mm
- Cover with polyethylene
- Leave for 24-48 hours
- Remove the poultice
- Rinse with water
- Repeat if necessary
Oily stains (oil, grease, cosmetics)
Method: a solvent poultice
- Soak the poultice material with acetone or white spirit
- Apply it to the stain
- Cover with polyethylene
- Leave for 24 hours
- Remove it and assess the result
- Repeat if necessary
Rust
Method: special products
- Use rust removers that are safe for stone
- Do NOT use acidic products on marble!
- Apply locally
- Rinse off thoroughly
Biological stains (mould, algae)
Method: biocidal products
- Treatment with special biocides
- Leave for the time given in the instructions
- Mechanical removal (a brush)
- Repeat treatment for prevention
Filling cracks and chips
Materials
Epoxy resins
- Two-component
- The possibility of matching the colour
- High strength
- Water resistance
Polyester resins
- Faster hardening
- Good adhesion to stone
- Can be polished
Cement mixes
- For large defects
- For travertine (filling pores)
Technology
- Cleaning the defect of dirt and dust
- Degreasing
- Matching the colour of the resin (pigments, stone chips)
- Mixing the components
- Filling the defect with an excess
- Removing the excess after it hardens
- Grinding flush with the surface
- Polishing
Filling the pores of travertine
The problem: the open pores of travertine collect dirt and make care harder.
The solution
Filling with epoxy resin:
- Cleaning the surface
- Applying the resin with an excess
- Removing the excess before it hardens
- Polishing after it hardens
Filling with a cement mix:
- Applying the mix
- Rubbing into the pores
- Removing the excess
- Grinding and polishing
Water-repellent treatment (impregnation)
When it is used
- After restoration
- To prevent new damage
- Regularly (once every 6-12 months)
Materials
Penetrating water repellents:
- Siloxane-based
- They do not change the appearance
- Protection from water and stains
- Vapour permeability is preserved
‘Wet-look’ coatings:
- They enhance the colour of the stone
- They give a light shine
- Protection + a decorative effect
Technology
- The surface must be clean and dry
- Application with a brush or roller
- An even coating without gaps
- Leave for the time given in the instructions
- Removing the excess (if needed)
- Reapplication (if needed)
Repairing stone joints
Re-grouting joints
Technology
- Removing the old grout
- Cleaning the joints
- Applying new grout
- Cleaning the stone surface
Choosing a grout
For polished stone:
- Sand-free grout
- A colour matching the stone
For antiqued stone:
- Grout with sand
- Natural shades
Repairing slab connections
The problem: cracks along the line of the joint between slabs.
The solution
- Removing the old filler
- Raking out the crack
- Filled with flexible sealant
- Shaping the joint
- Removing the excess
When full replacement is needed rather than restoration
Indications for replacing the surface
Widespread damage
- More than 30-40% of the tile is damaged
- Cracks across the whole area
- Widespread delamination
Problems with the base
- Destruction of the screed
- Active cracks in the base
- Problems with waterproofing
Obsolescence
- A wish to update the design
- Not meeting modern requirements
- A change in the function of the room
Economic impracticality
- The cost of restoration approaches the cost of replacement
- There is no spare tile and a match is impossible
- A guarantee on the new surface matters more
Advantages of restoration over replacement
| Parameter | Restoration | Full replacement |
|---|---|---|
| Time | A few days | Weeks |
| Inconvenience | Minimal | Significant |
| Waste | A minimum | A lot |
| Preserving the original | Yes | No |
Preventing damage
For porcelain stoneware
Rules of use
- Pads under heavy furniture
- Mats by the entrance (to collect sand and dirt)
- Timely cleaning
- Do not drop heavy objects
Care
- Regular damp cleaning
- Neutral products
- Periodic deep cleaning
For natural stone
Rules of use
- Immediately removing spilled liquids
- Avoiding acids on marble and travertine
- Using coasters and napkins
- Protection from mechanical impact
Care
- Only specialised products
- Regular water-repellent treatment
- Periodic polishing
Contact information
M-STONE: repair and restoration of surfaces
📞 Phones: +38 068 100 27 96, +38 050 914 18 99 📧 Email: [email protected] 🌐 Website: https://mstone.ua/
Social media
- Instagram: https://www.instagram.com/mstone_kiev/
- Facebook: https://www.facebook.com/mstone.kyiv/
- YouTube: https://www.youtube.com/@M-Stone_Kyiv/
Geography of work
Kyiv: all districts Kyiv region: Brovary, Irpin, Bucha, Vyshhorod, Vyshneve, Boyarka, Kozyn, Koncha-Zaspa and others All of Ukraine: visits for restoration projects
M-STONE advantages for restoration
✅ Restoration experience: all types of damage ✅ Work with stone: marble, travertine, granite, onyx ✅ Grinding and polishing: professional equipment ✅ Stain removal: even difficult cases ✅ A water-repellent treatment: protection after restoration ✅ Re-grouting: renewing the joints ✅ Replacing tile: exact matching
The current cost of work for your project can be calculated in the online calculators or confirmed by the manager: it depends on the material, the slab format and the condition of the substrate. The consultation is free.

About M-STONE
This material was prepared by the M-STONE team: 20 years of brand history, installation of large-format tile and natural stone in Kyiv and across Ukraine. The company is led by Oleg Dolynskyi. The recommendations describe the typical order of work; a specialist refines the solution for your project after a consultation.
Contact us
We will price your project
Send the dimensions and slab format: we will calculate the material and installation and suggest the timing.